Home |
About Us |
Back
How to Generate the Proper Report Format Using Liberty POS from Resaleworld.com, Inc.
INSTALLATION
When LIBERTY-PDF is chosen as the Upload File Type (see Store Page) then the following apply:
Liberty POS Software exports reports in PDF format using a PDF printer driver.
Therefore, the PDF2TXT v3.2 program must be purchased and licensed from VeryPDF
and installed. This will convert the PDF file into a TEXT file.
Here are step-by-step instructions:
1. Create the directory C:\report\
2. Download and install PDF2TXT. Most likely this will install itself into the
"Program Files (x86)" directory.
3. Apply the license key aka keycode/serial number: 53JHG$$@J3890J83
4. Copy ALL contents of directory "C:\Program Files (x86)\VeryPDF PDF2TXT v3.2\" into the C:\report\ directory. This
allows PDF2TXT.EXE to run in the "report" directory. This is optional but it puts all
files/apps in the same folder. If you do this you may need to modify the SALES_UPLOAD.BAT
file from:
C:\Program Files (x86)\VeryPDF PDF2TXT v3.2\pdf2txt.exe C:\report\view.pdf C:\report\view.txt -unicode
to:
pdf2txt.exe C:\report\view.pdf C:\report\view.txt -unicode
5. Download "helper files" and install them into the same "report" directory.
6. Keeping all files in the same directory makes it easy to backup and restore. These
files can be copied and moved repeatedly and you do not need to re-apply the license key
aka keycode/serial number for pdf2txt.exe.
A Typical SALES_UPLOAD.BAT file downloaded from the Store Profile may look like this:
C:\Program Files (x86)\VeryPDF PDF2TXT v3.2\pdf2txt.exe C:\report\view.pdf C:\report\view.txt -unicode
MALLUPLD.EXE -usernamemallowner@mall-central.com -password3ddu711 -v -z -S .tmp mall-central.com STOREID_bch4kfut7 view.txt
start https://www.mall-central.com/cgi-bin/mc-report.cgi?storeID=ALL");
pause
But, it may need to be changed to this:
pdf2txt.exe C:\report\view.pdf C:\report\view.txt -unicode
MALLUPLD.EXE -usernamemallowner@mall-central.com -password3ddu711 -v -z -S .tmp mall-central.com STOREID_bch4kfut7 view.txt
start https://www.mall-central.com/cgi-bin/mc-report.cgi?storeID=ALL");
pause
Note that the path to PDF2TXT.EXE is simpler.
Our old Report Page was ompvsales.cgi and our new Report Page is mc-report.cgi. Do not
use the old Report Page.
Create shortcut for SALES_UPLOAD.BAT and place on Desktop for your convenience.
GENERATE REPORT
The generated report will be stored in the C:\report\ directory. Subsequent reports will
replace the older report.
Launch Liberty 5 if it is not already running.
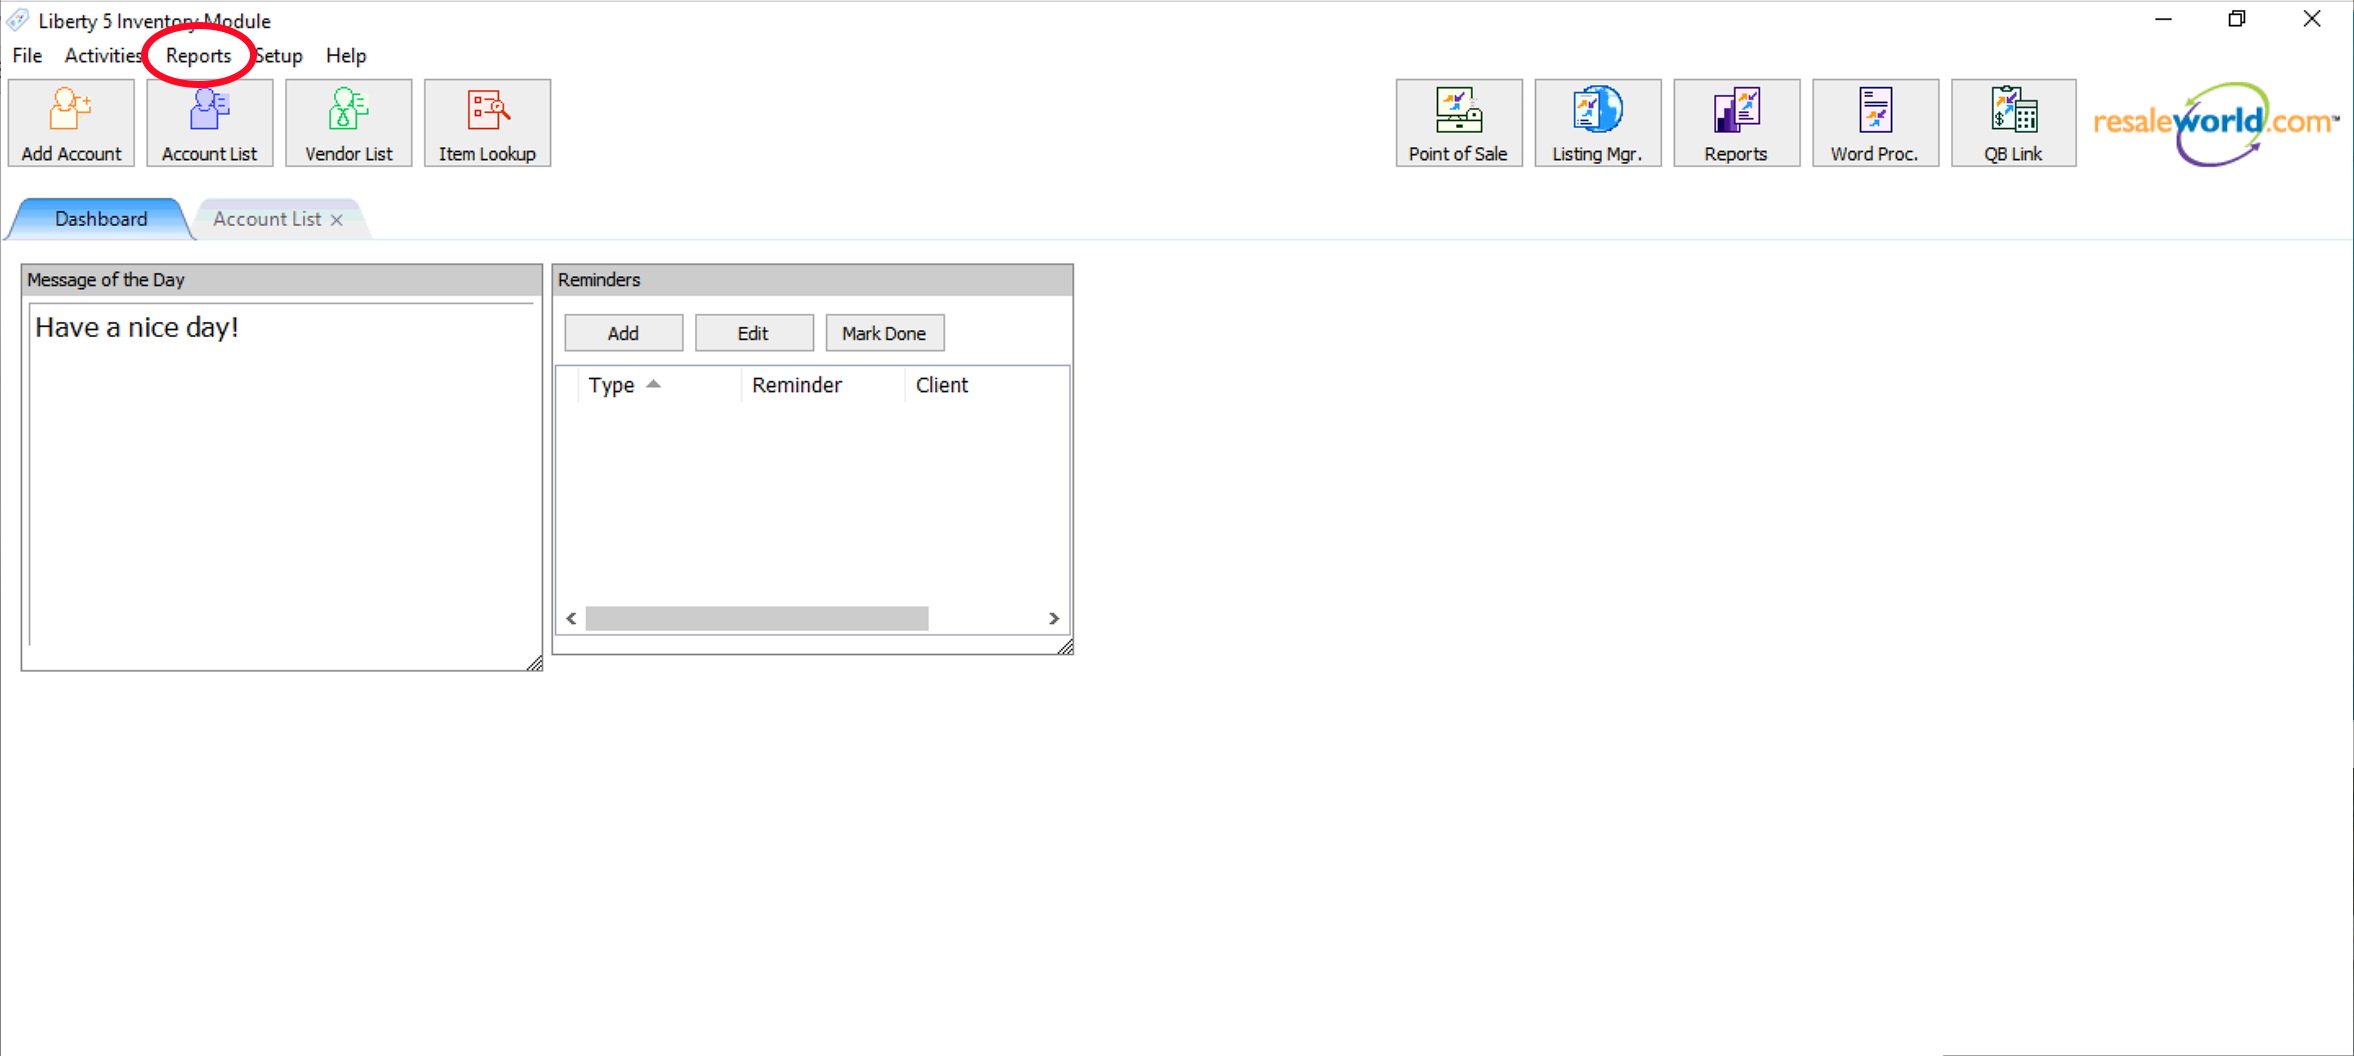
1. Go to reports
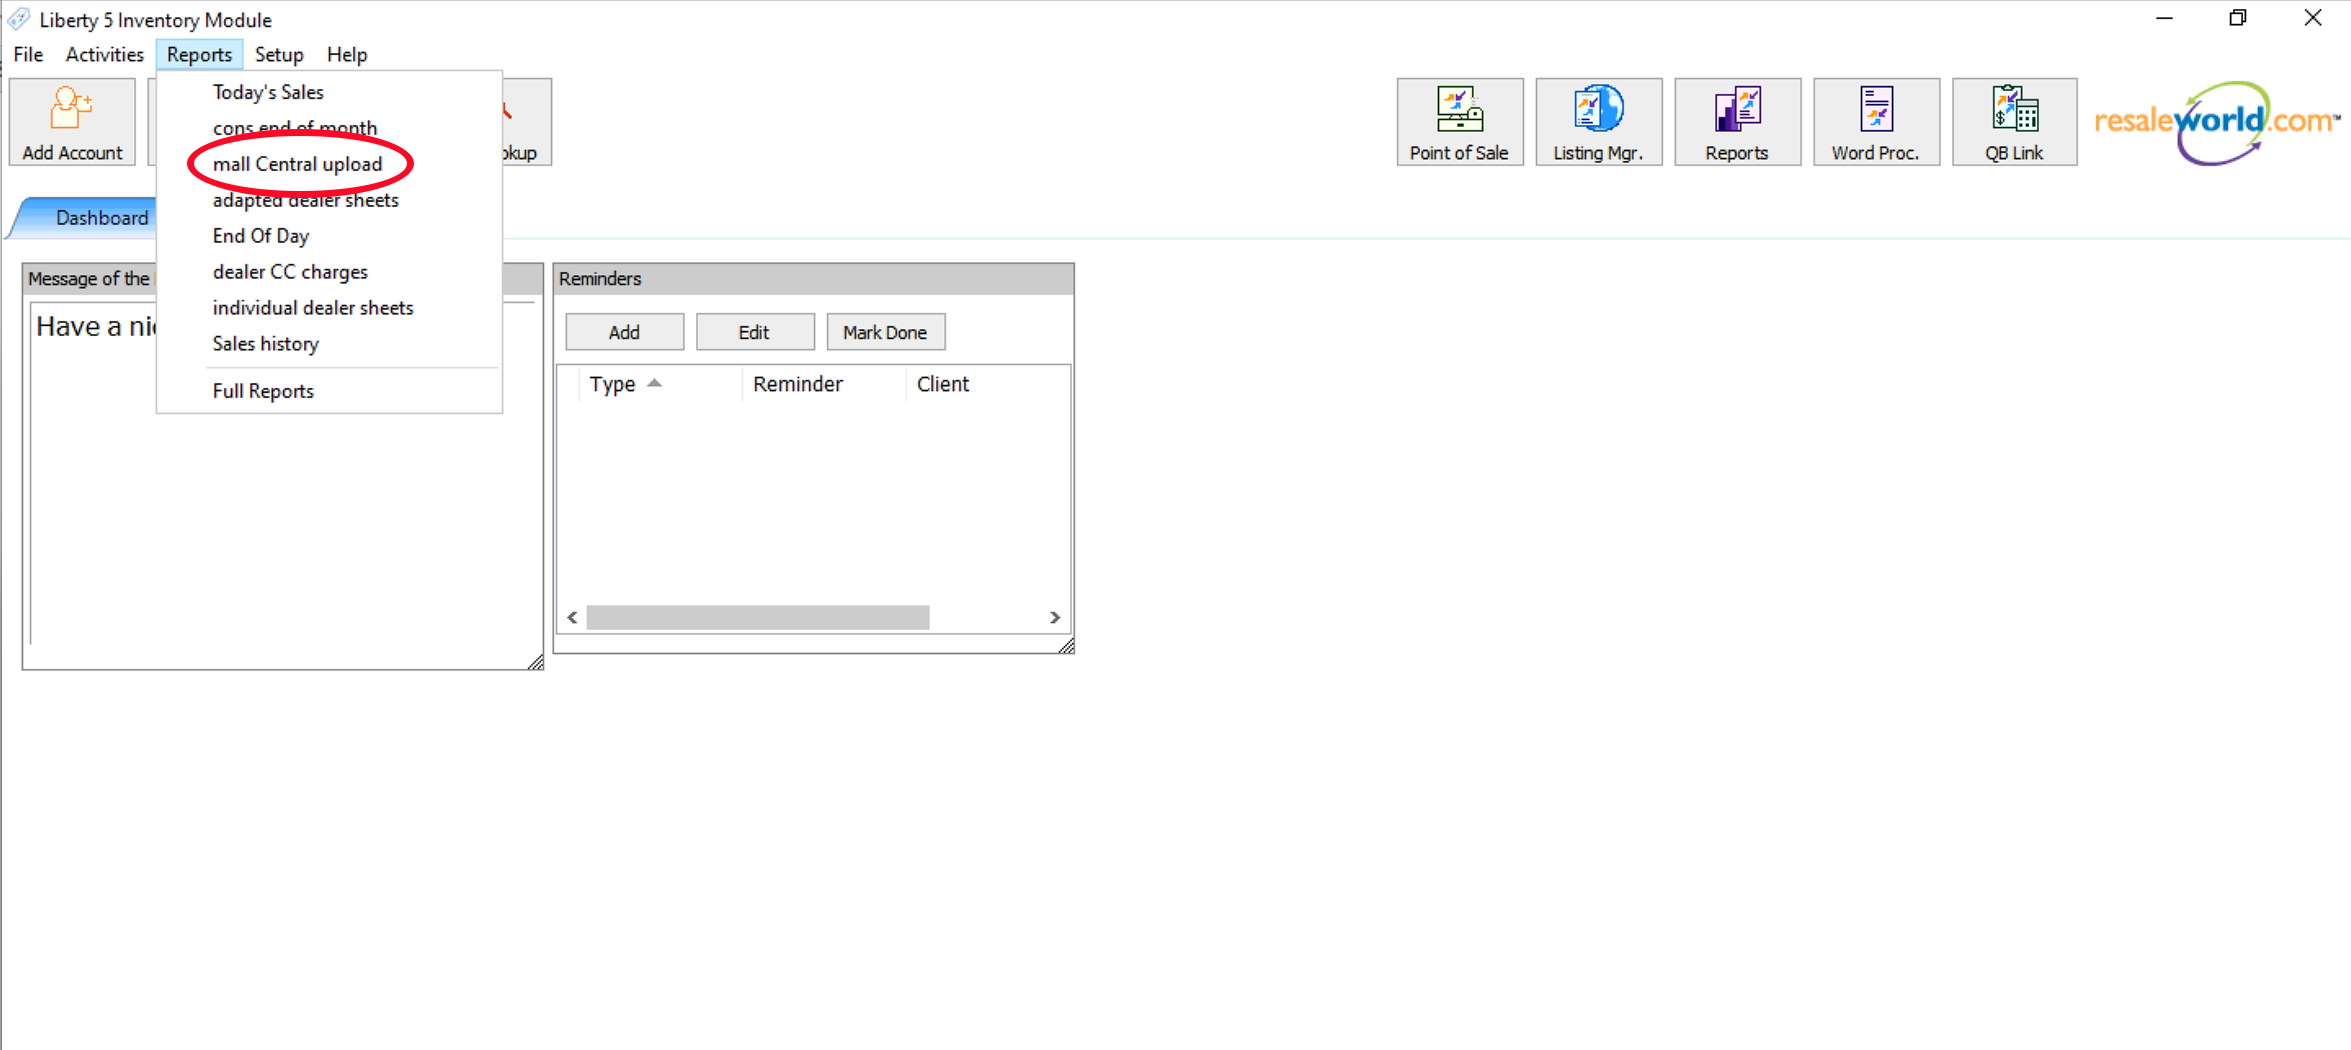
 2. "mall Central upload" is one of the menu selections but I do not know how it got there.
But Chase (the IT guy who re-installed Liberty 5 for piccolo) sent me these notes:
"So I had to edit the directory in the the bak file as it was pointing at the wrong
location. It had to be changed from C\:program files\reports to just C\:reports"
2. "mall Central upload" is one of the menu selections but I do not know how it got there.
But Chase (the IT guy who re-installed Liberty 5 for piccolo) sent me these notes:
"So I had to edit the directory in the the bak file as it was pointing at the wrong
location. It had to be changed from C\:program files\reports to just C\:reports"
 3. Specify date range (we suggest uploading last and current pay periods) and click Preview.
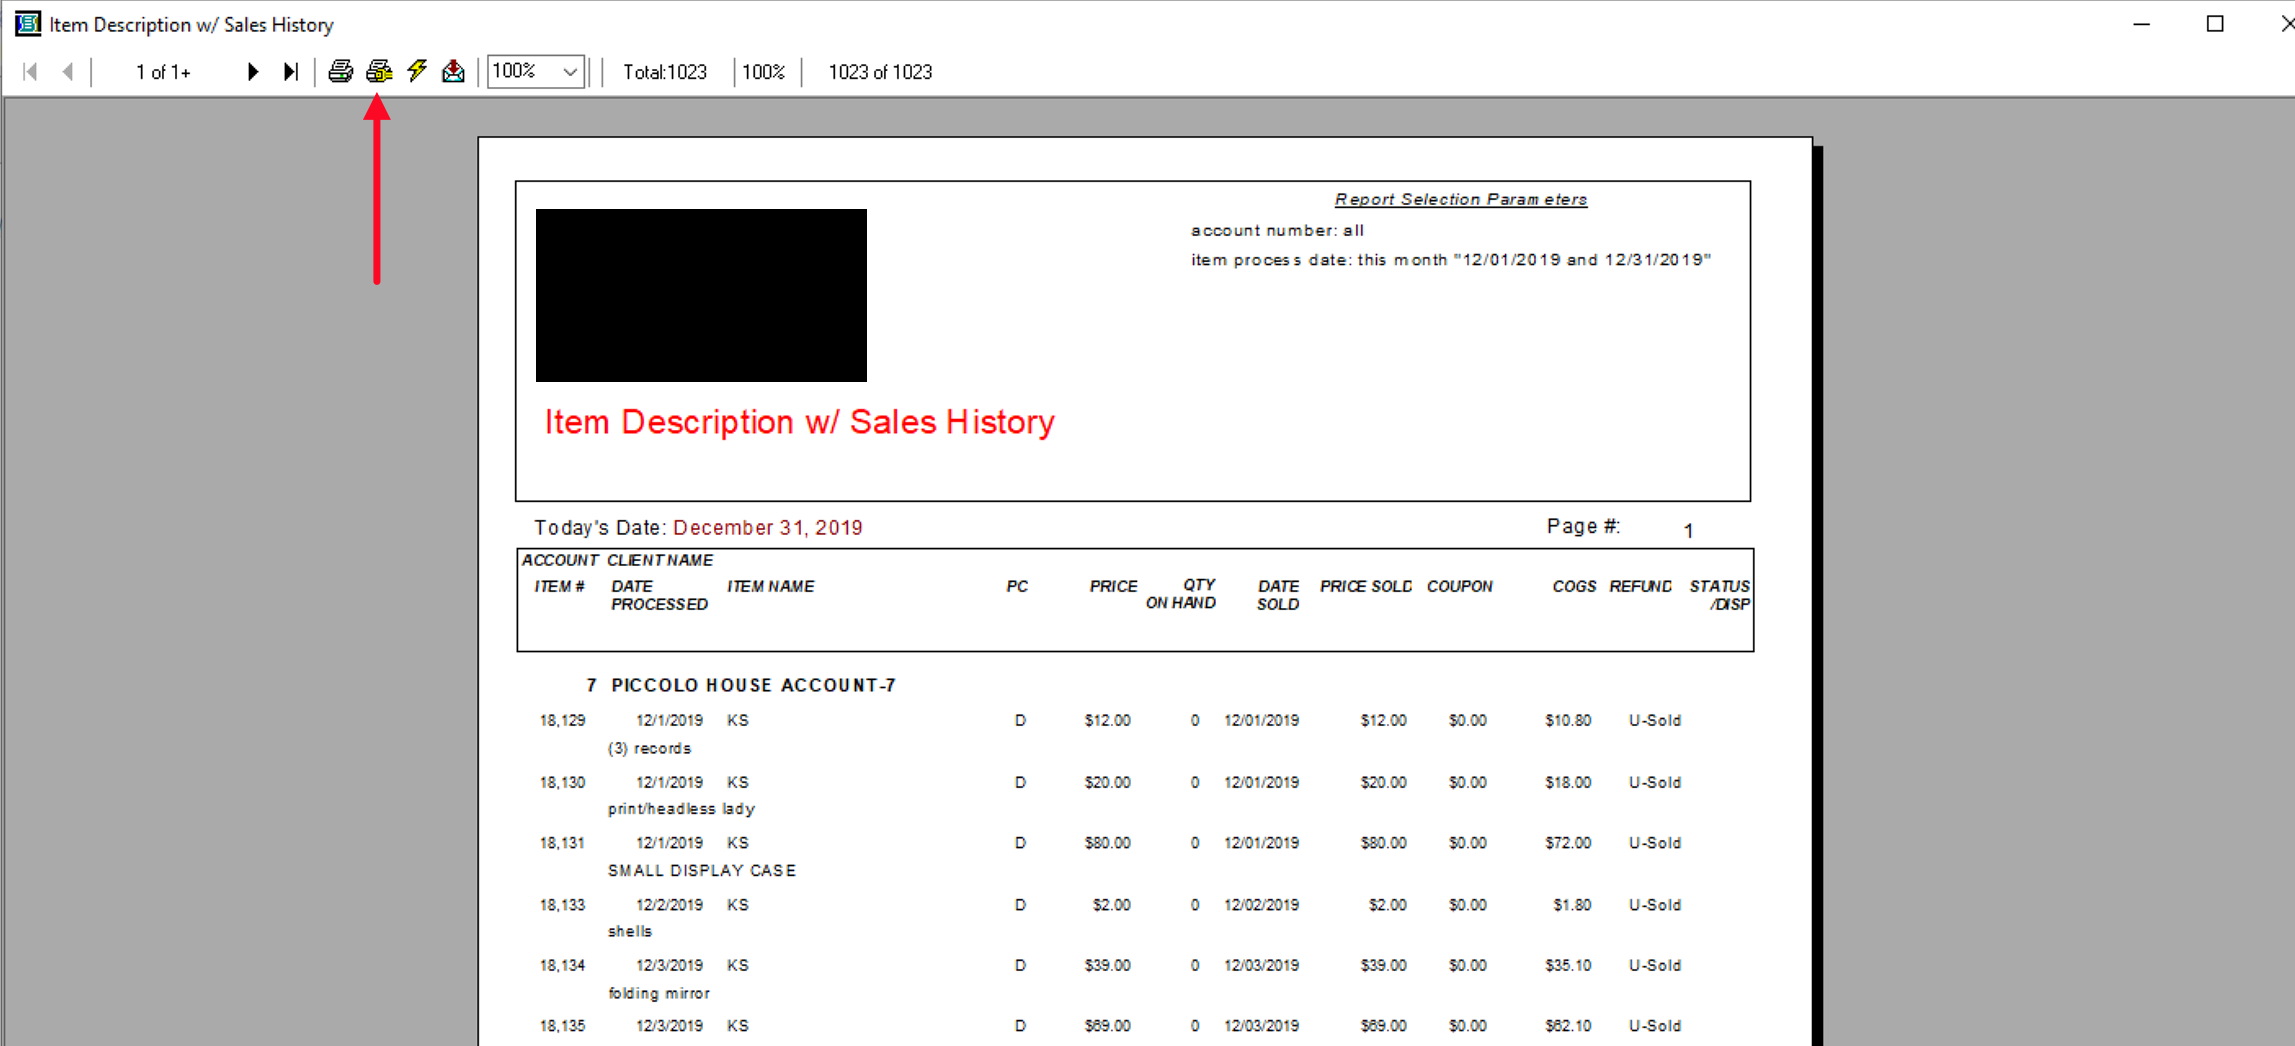
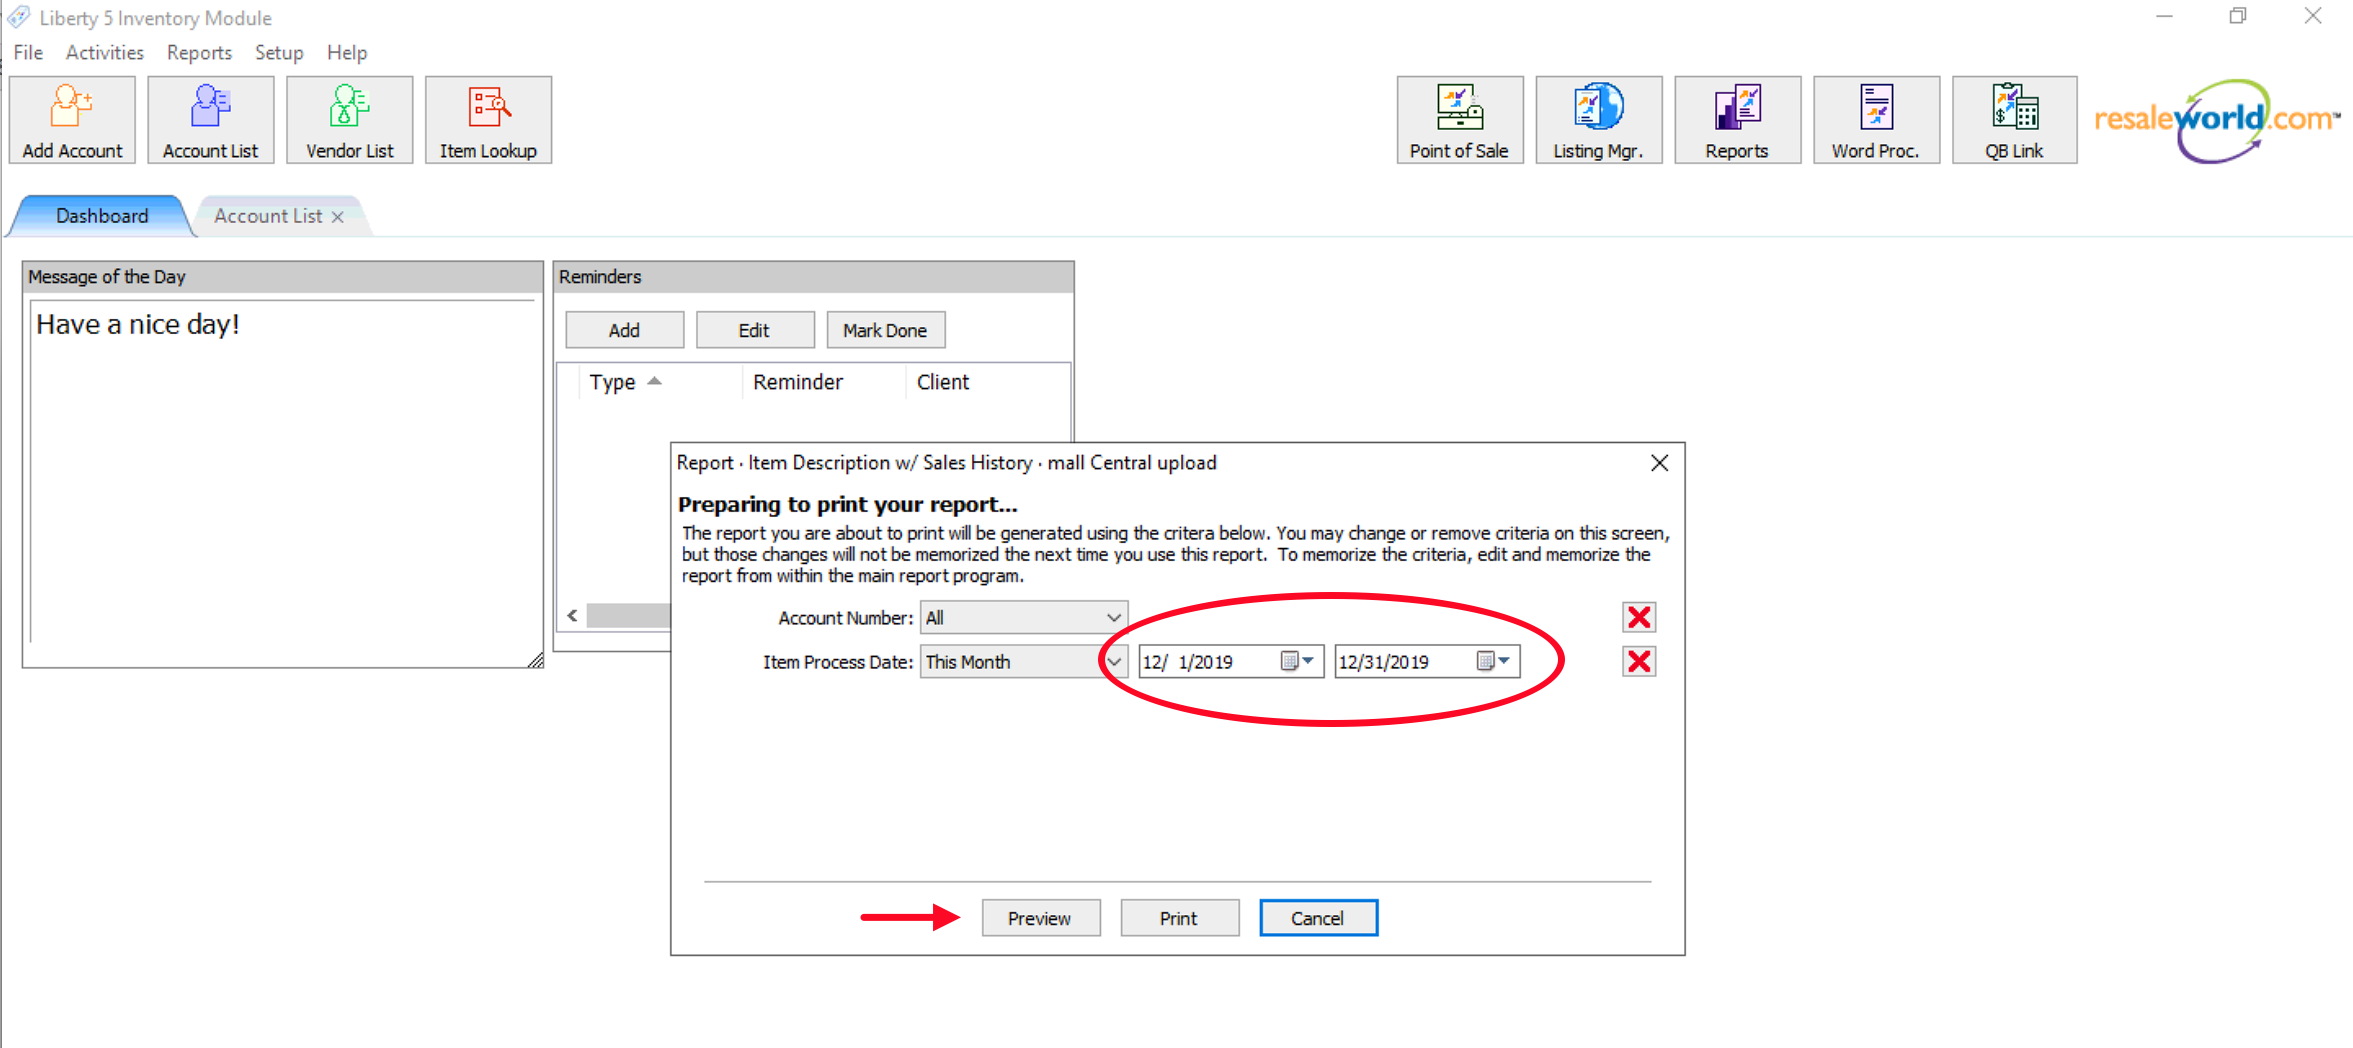 4. Your report will appear. Next click on Printer with wrench icon.

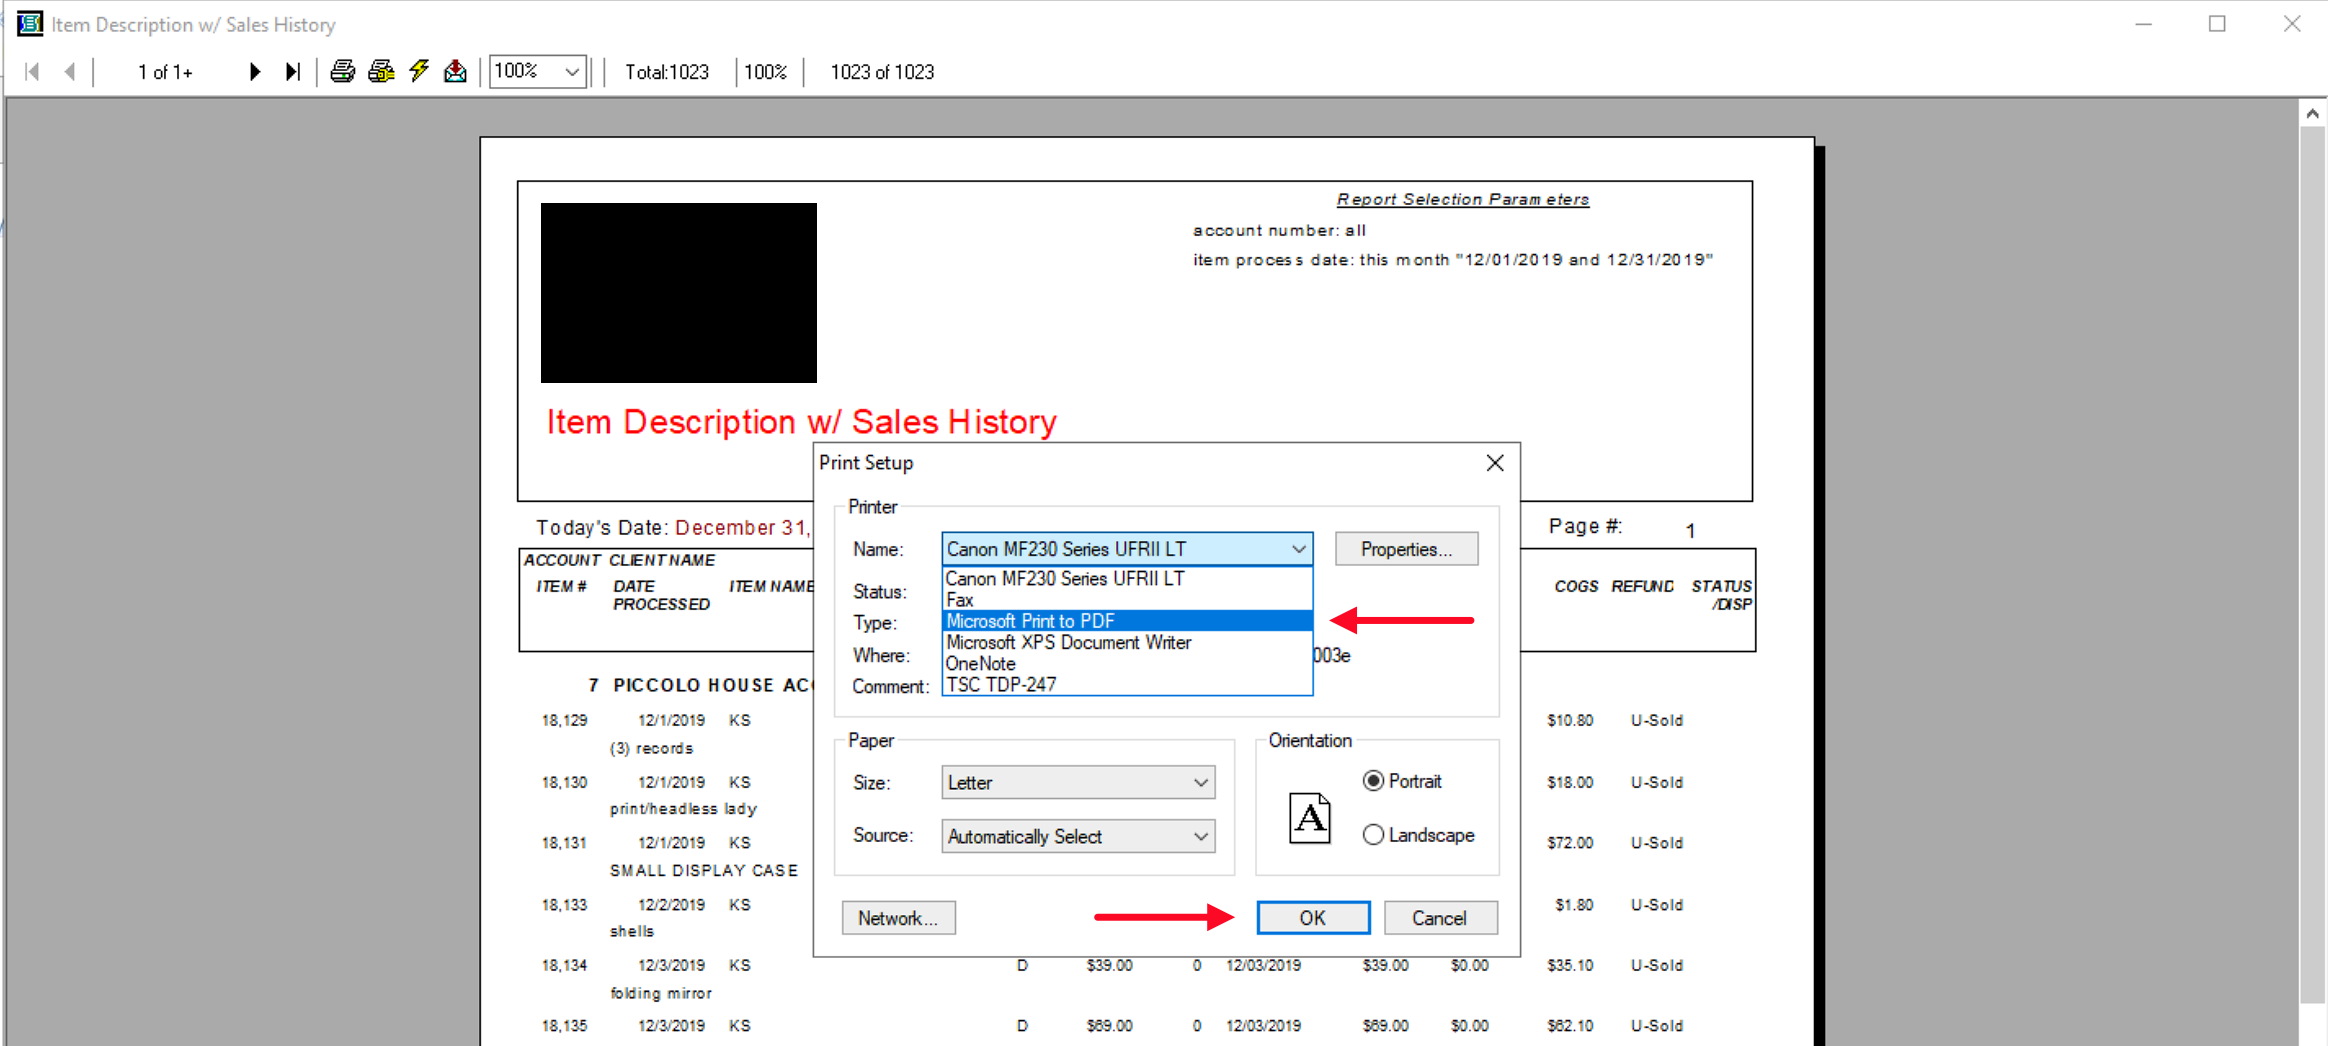
 5. Select "Microsoft Print to PDF" and then click on the "OK" button.
 6. Click on Printer icon top of screen.

 6a. Click OK button in the Microsoft Print to PDF on PORTPROMPT dialog.
 7. A navigation window appears which gives you the ability to select and specify name of
the file and where it is to be saved.
If this is the first time you will need to navigate to C:\report. Create the folder
"report" if you have to. Then you will need to specify the file name which is
"view.pdf" (2). Also, make sure "Save as type:" is PDF as shown.
If this is not the first time then you should see the already existing file in the
C:\report folder. Clicking on the file (1) will put the name of the file in (2).
Click on the "SAVE" button (3).
7. A navigation window appears which gives you the ability to select and specify name of
the file and where it is to be saved.
If this is the first time you will need to navigate to C:\report. Create the folder
"report" if you have to. Then you will need to specify the file name which is
"view.pdf" (2). Also, make sure "Save as type:" is PDF as shown.
If this is not the first time then you should see the already existing file in the
C:\report folder. Clicking on the file (1) will put the name of the file in (2).
Click on the "SAVE" button (3).
 8. If this is the first time you will not see the next window. Subsequent saves will
require the replacement of the existing file. Click on "YES".
8. If this is the first time you will not see the next window. Subsequent saves will
require the replacement of the existing file. Click on "YES".
 9. Closed (not minimize) the Preview window (step 4 above) and close (not minimize) the
"Report - Item Description w/ Sales History - mall Central upload" window (step 3 above)
to get back to the main screen of Liberty 5 as shown in step 1.
10. Click on Sales_Upload.BAT shortcut usually placed on you desktop. A black DOS Command
window appears (you may first have to "Run Anyway" in a warning window that may pop up).
This is what the screen normally looks like. Error messages may appear between the white
lines of text and be hard to see if they are there. Common errors are "can not connect to
host" meaning an Internet issue or "can not open file for reading" meaning you did not
close the two windows mentioned earlier or "program not recognized" meaning a "helper"
file is missing (such as MALLUPLD.EXE or PDF2TXT.EXE).
9. Closed (not minimize) the Preview window (step 4 above) and close (not minimize) the
"Report - Item Description w/ Sales History - mall Central upload" window (step 3 above)
to get back to the main screen of Liberty 5 as shown in step 1.
10. Click on Sales_Upload.BAT shortcut usually placed on you desktop. A black DOS Command
window appears (you may first have to "Run Anyway" in a warning window that may pop up).
This is what the screen normally looks like. Error messages may appear between the white
lines of text and be hard to see if they are there. Common errors are "can not connect to
host" meaning an Internet issue or "can not open file for reading" meaning you did not
close the two windows mentioned earlier or "program not recognized" meaning a "helper"
file is missing (such as MALLUPLD.EXE or PDF2TXT.EXE).

Line 1: Converts view.pdf to view.txt
Line 2: Uploads view.txt to our server
Line 3: Upload Status
Line 4: Launches your browser to help you check your sales
Line 5: Hit any key to continue.
- end -
Back to Store Page instructions