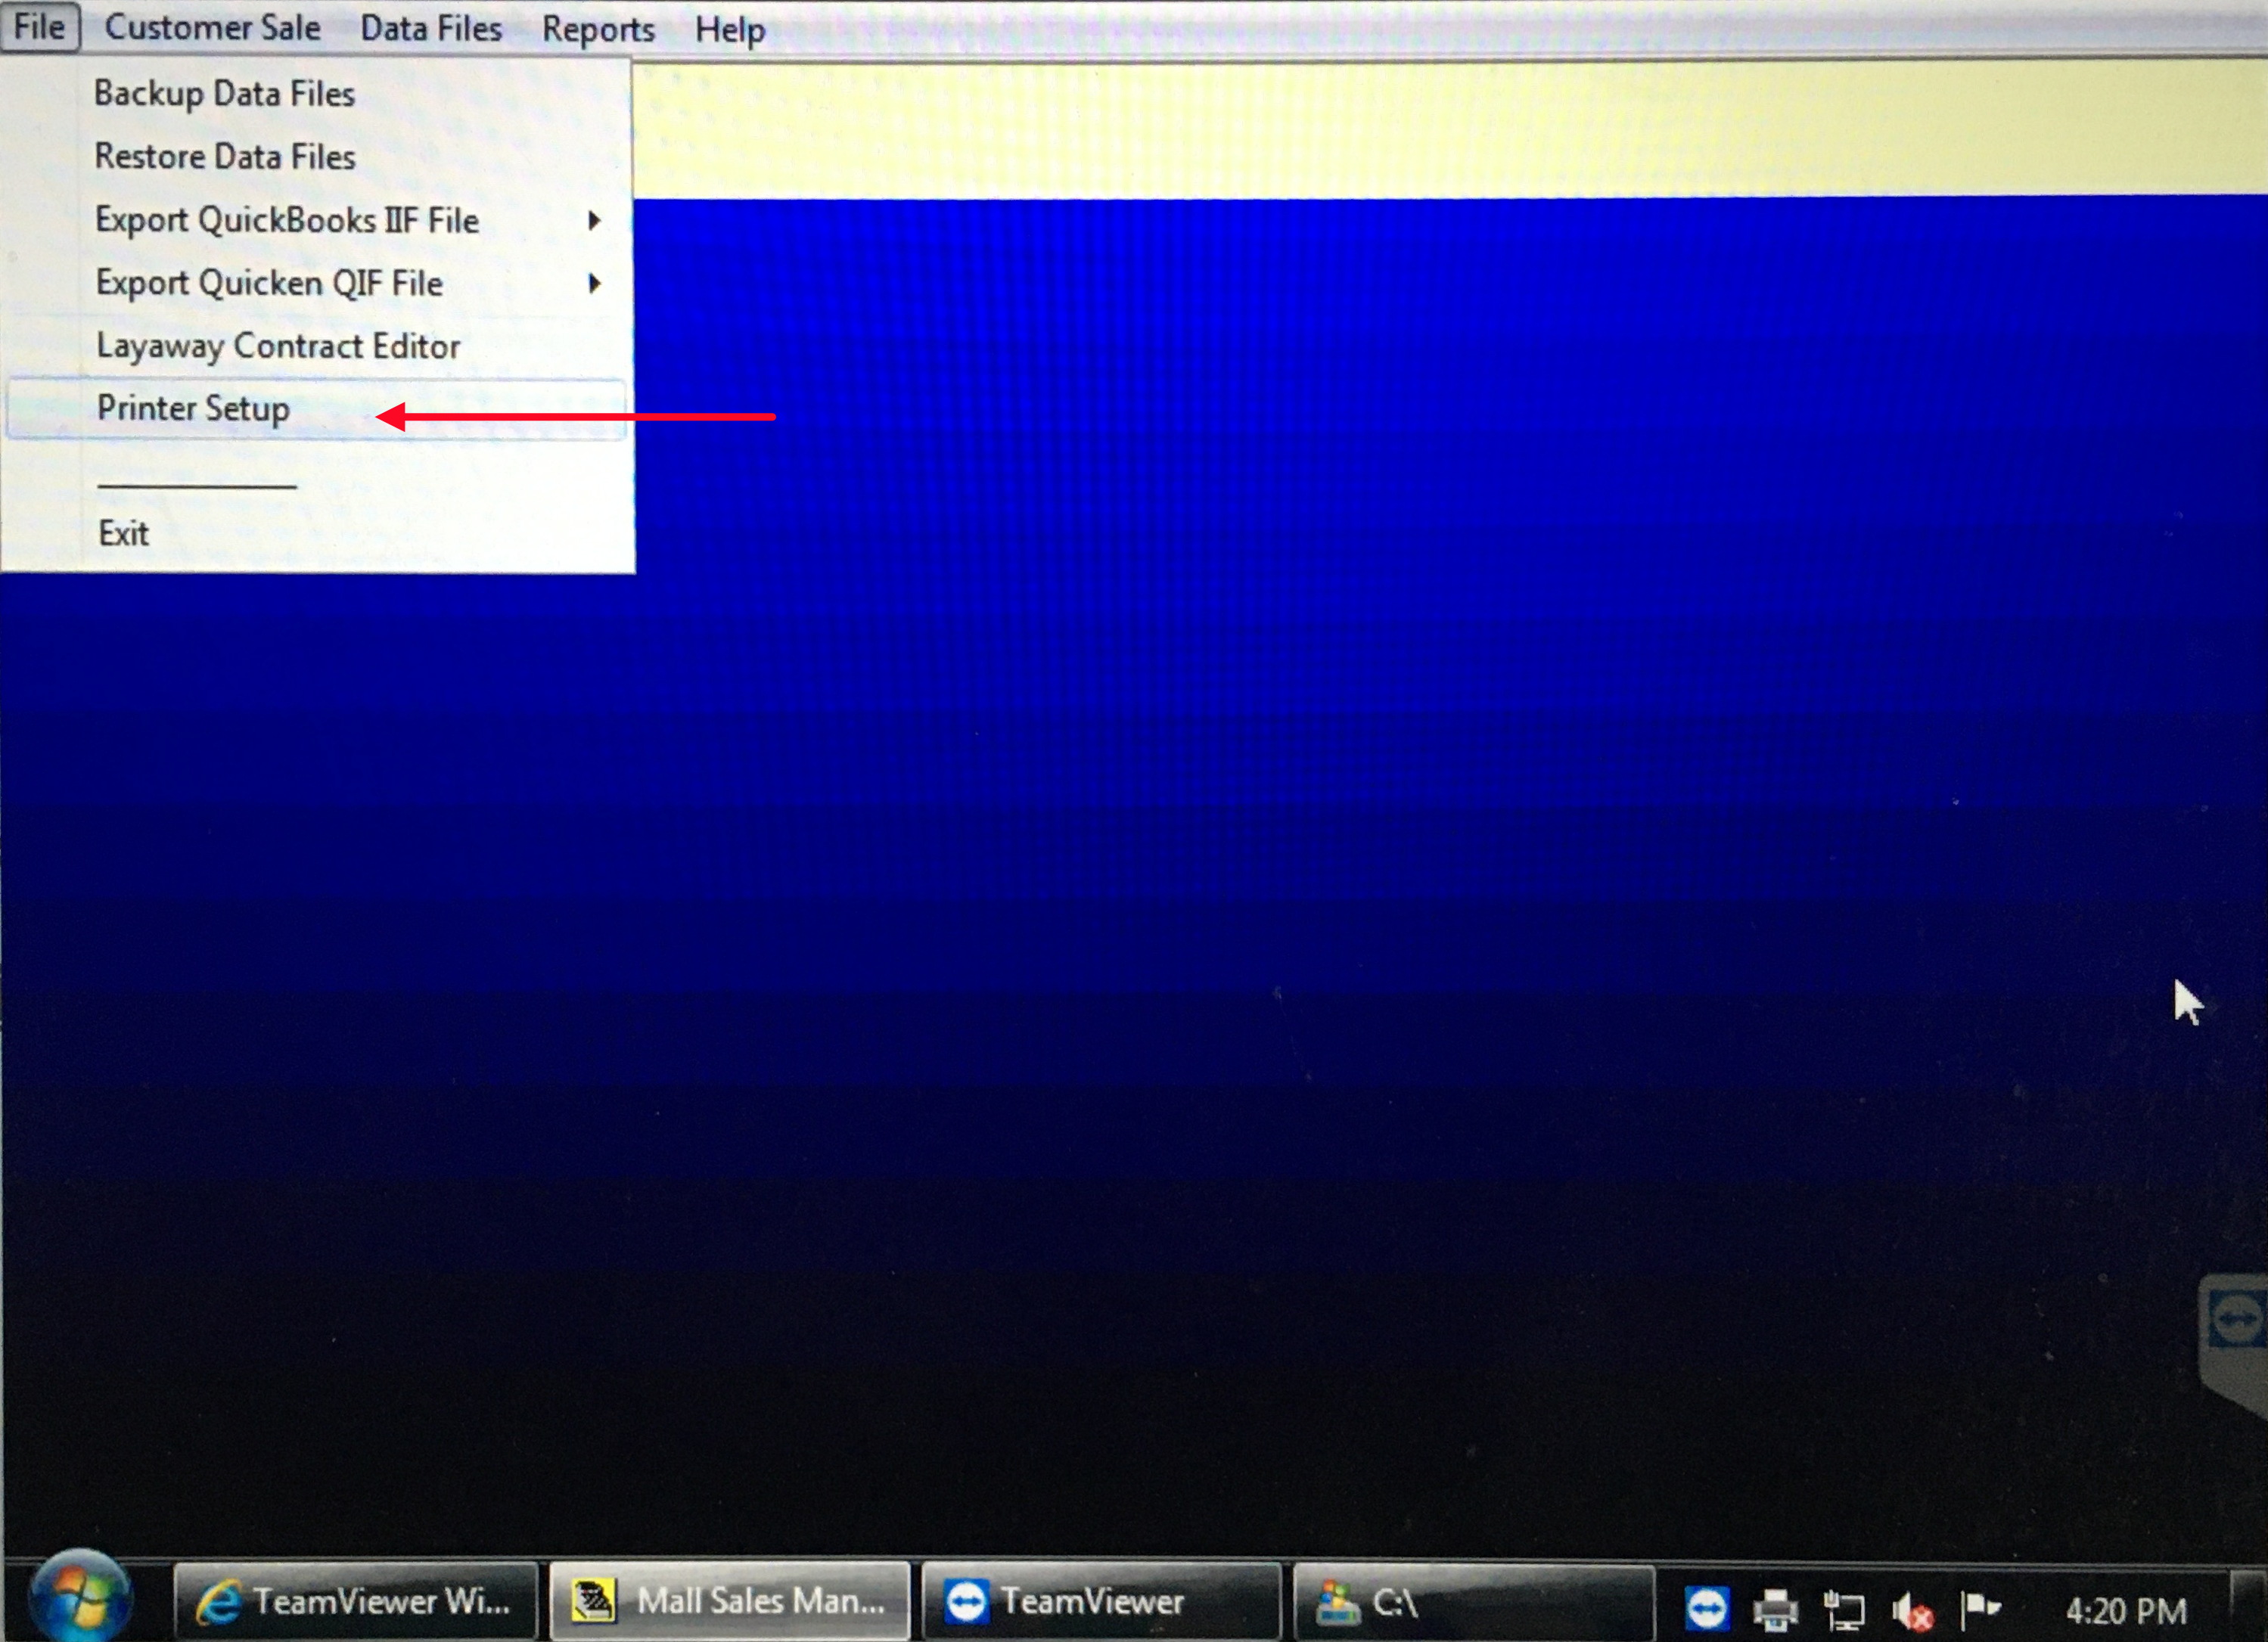
Version 2.0 You must create a new printer driver called Generic/Text Only using the Add Printer Wizard. Once you do this you dont have to do it again. Using the wizard select Local Printer Attached to this Computer. Then specify the port as FILE: (print to File). Then select Generic and Generic/Text Only. Finish the wizard as appropriate. From the main screen of Mall Sales Manager, select "File>Printer Setup".
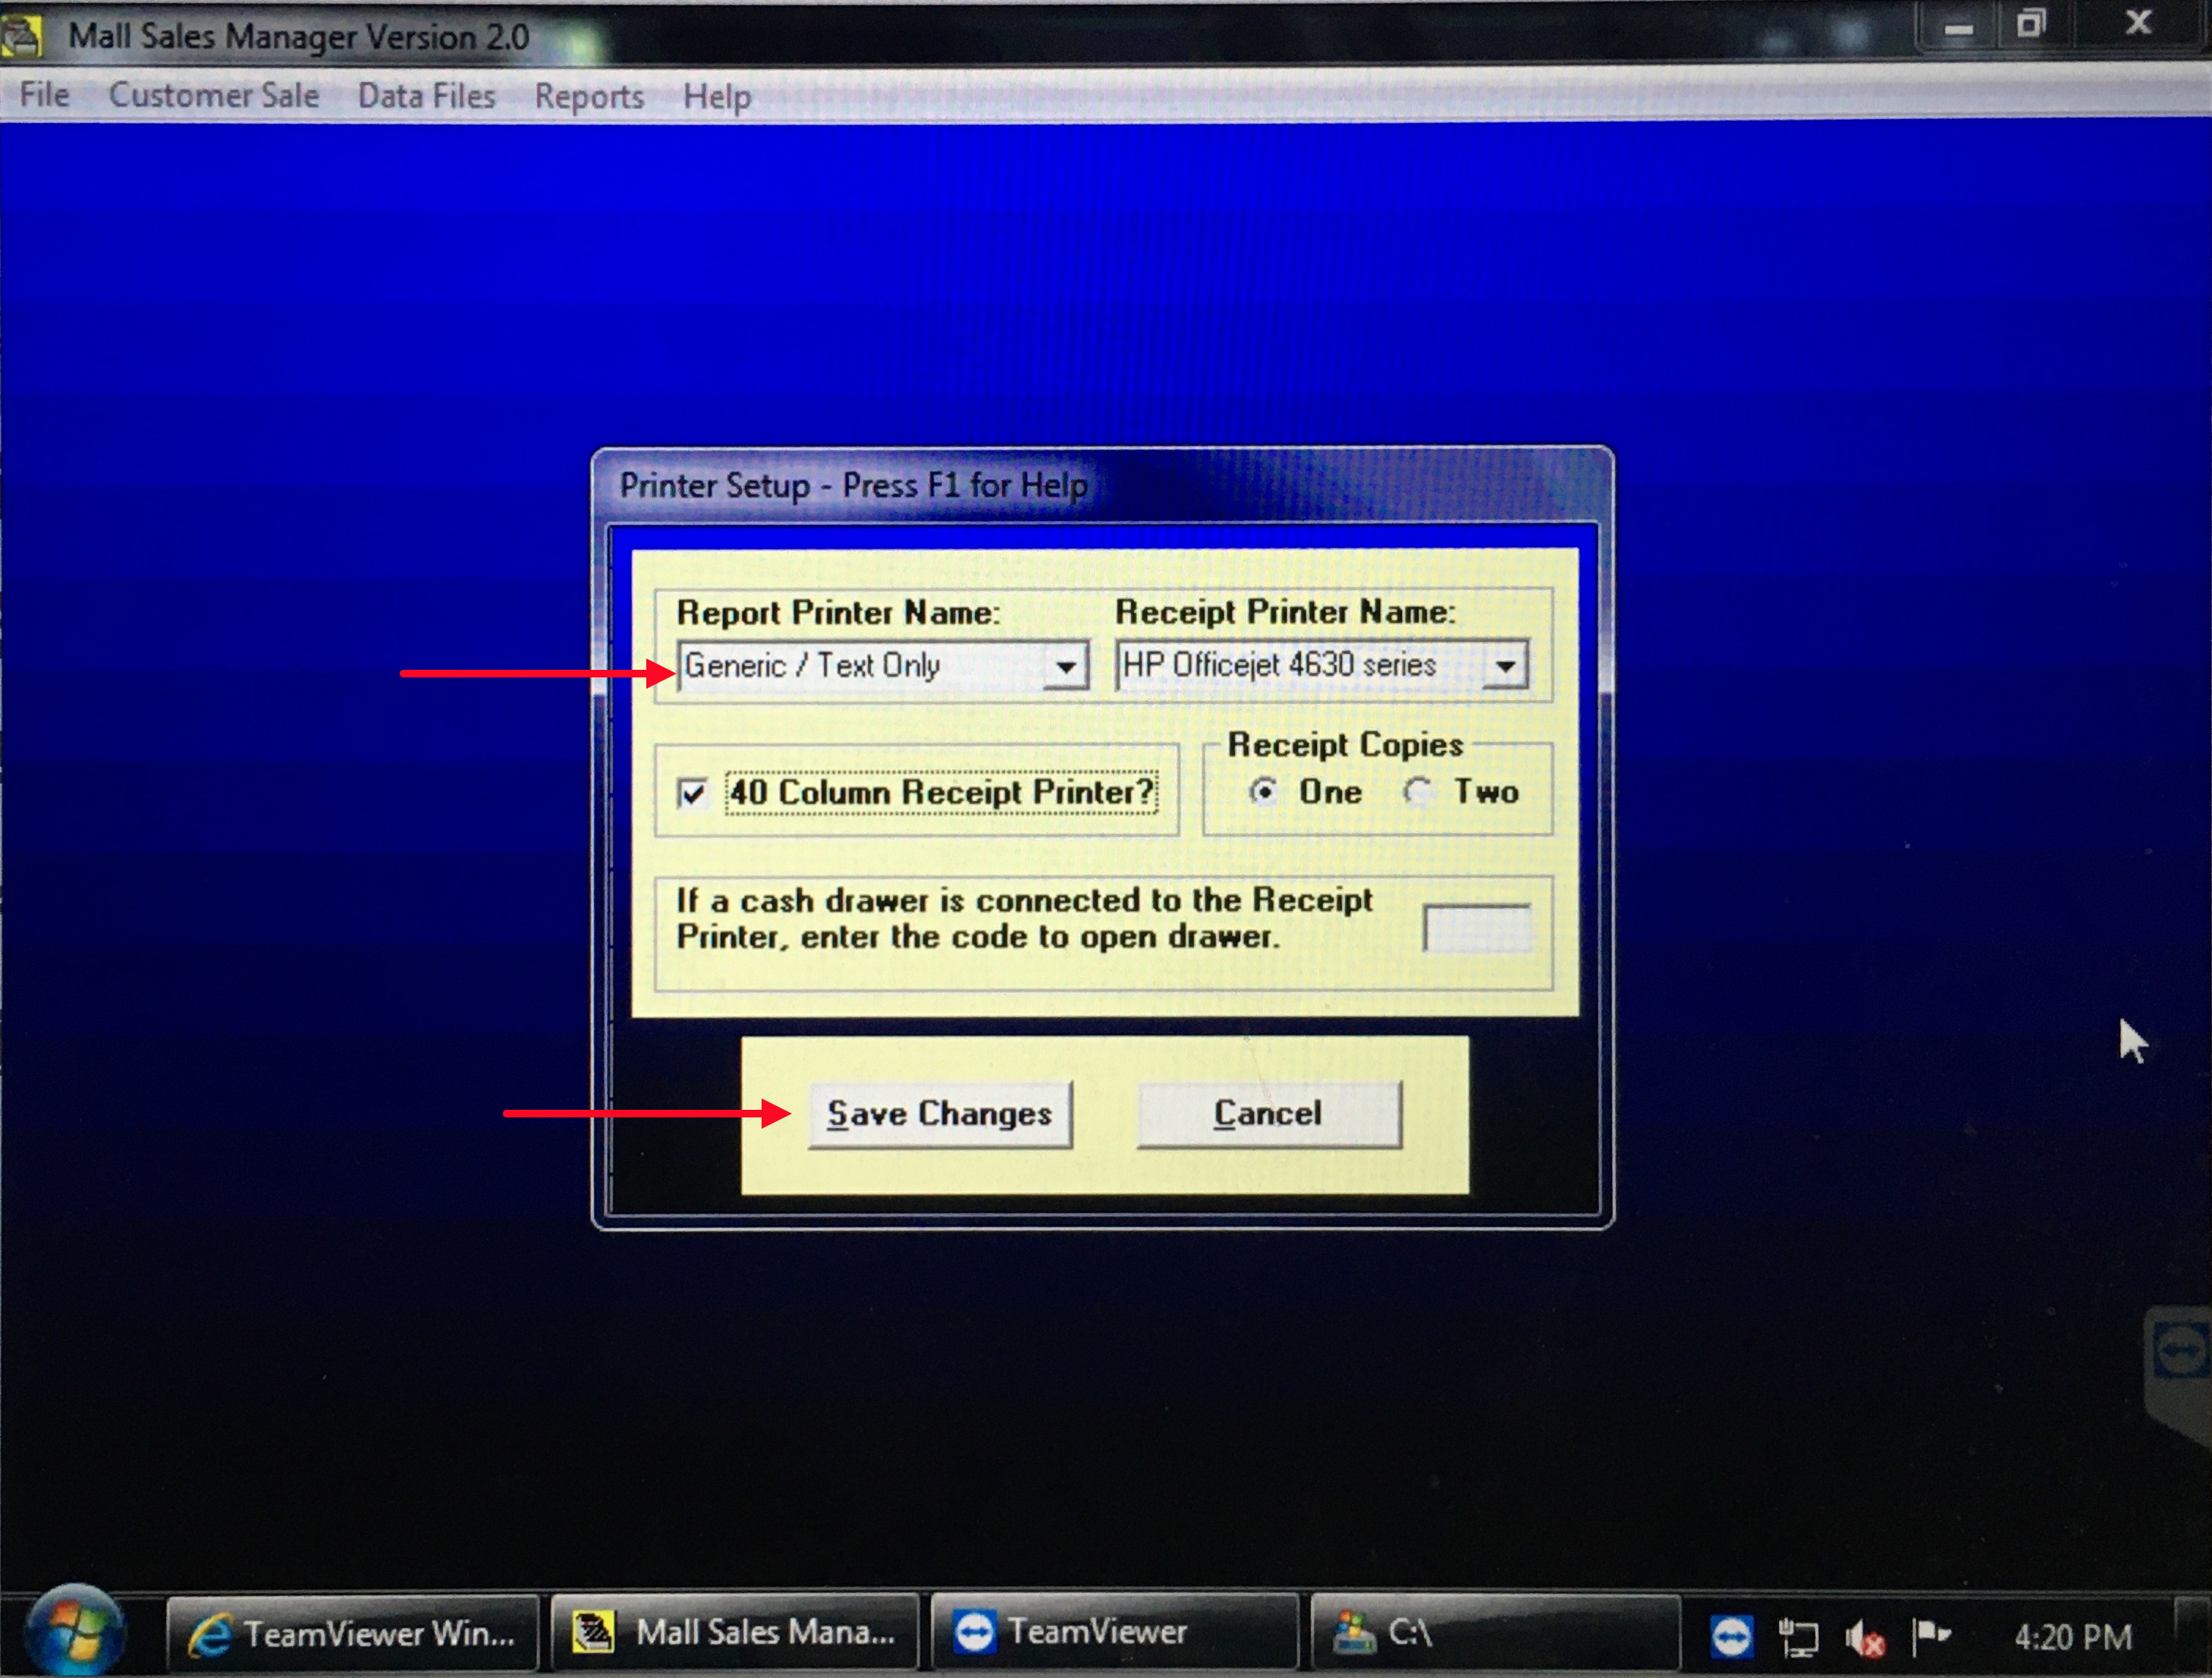
 Select the Generic printer for the Reports. Remember the printer that was
selected as you will want to change it back after creating the report.
Select the Generic printer for the Reports. Remember the printer that was
selected as you will want to change it back after creating the report.
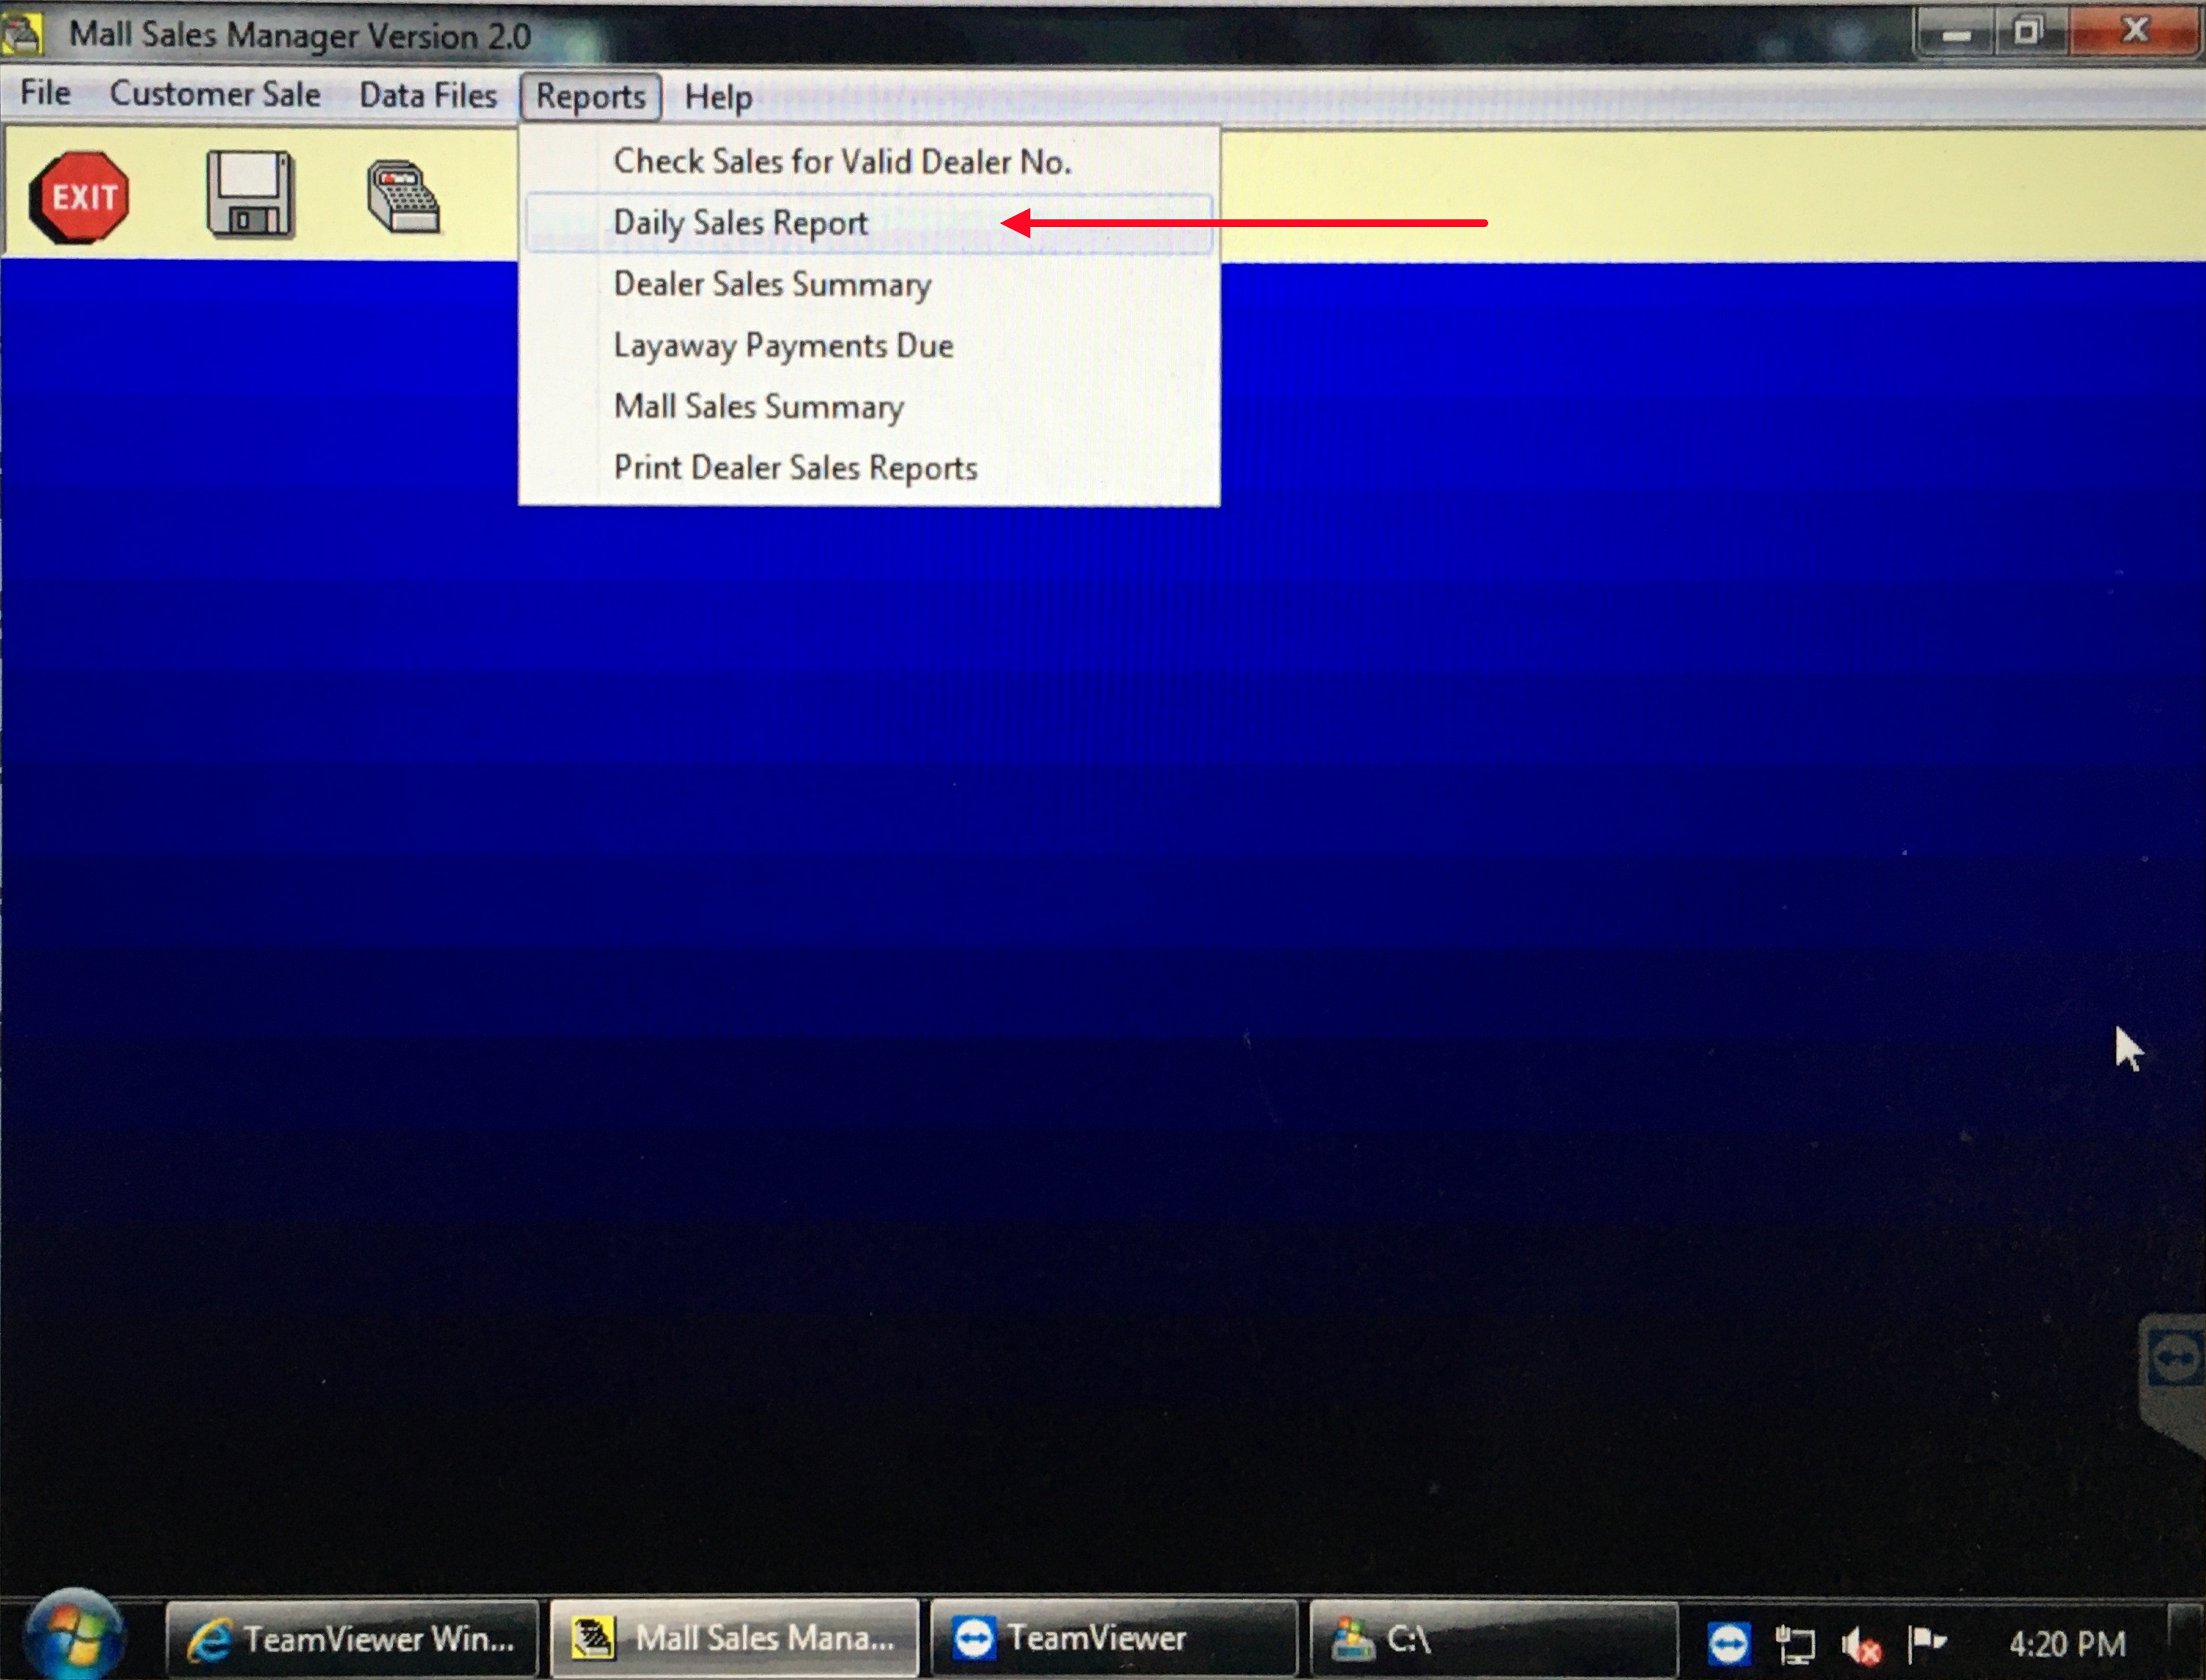
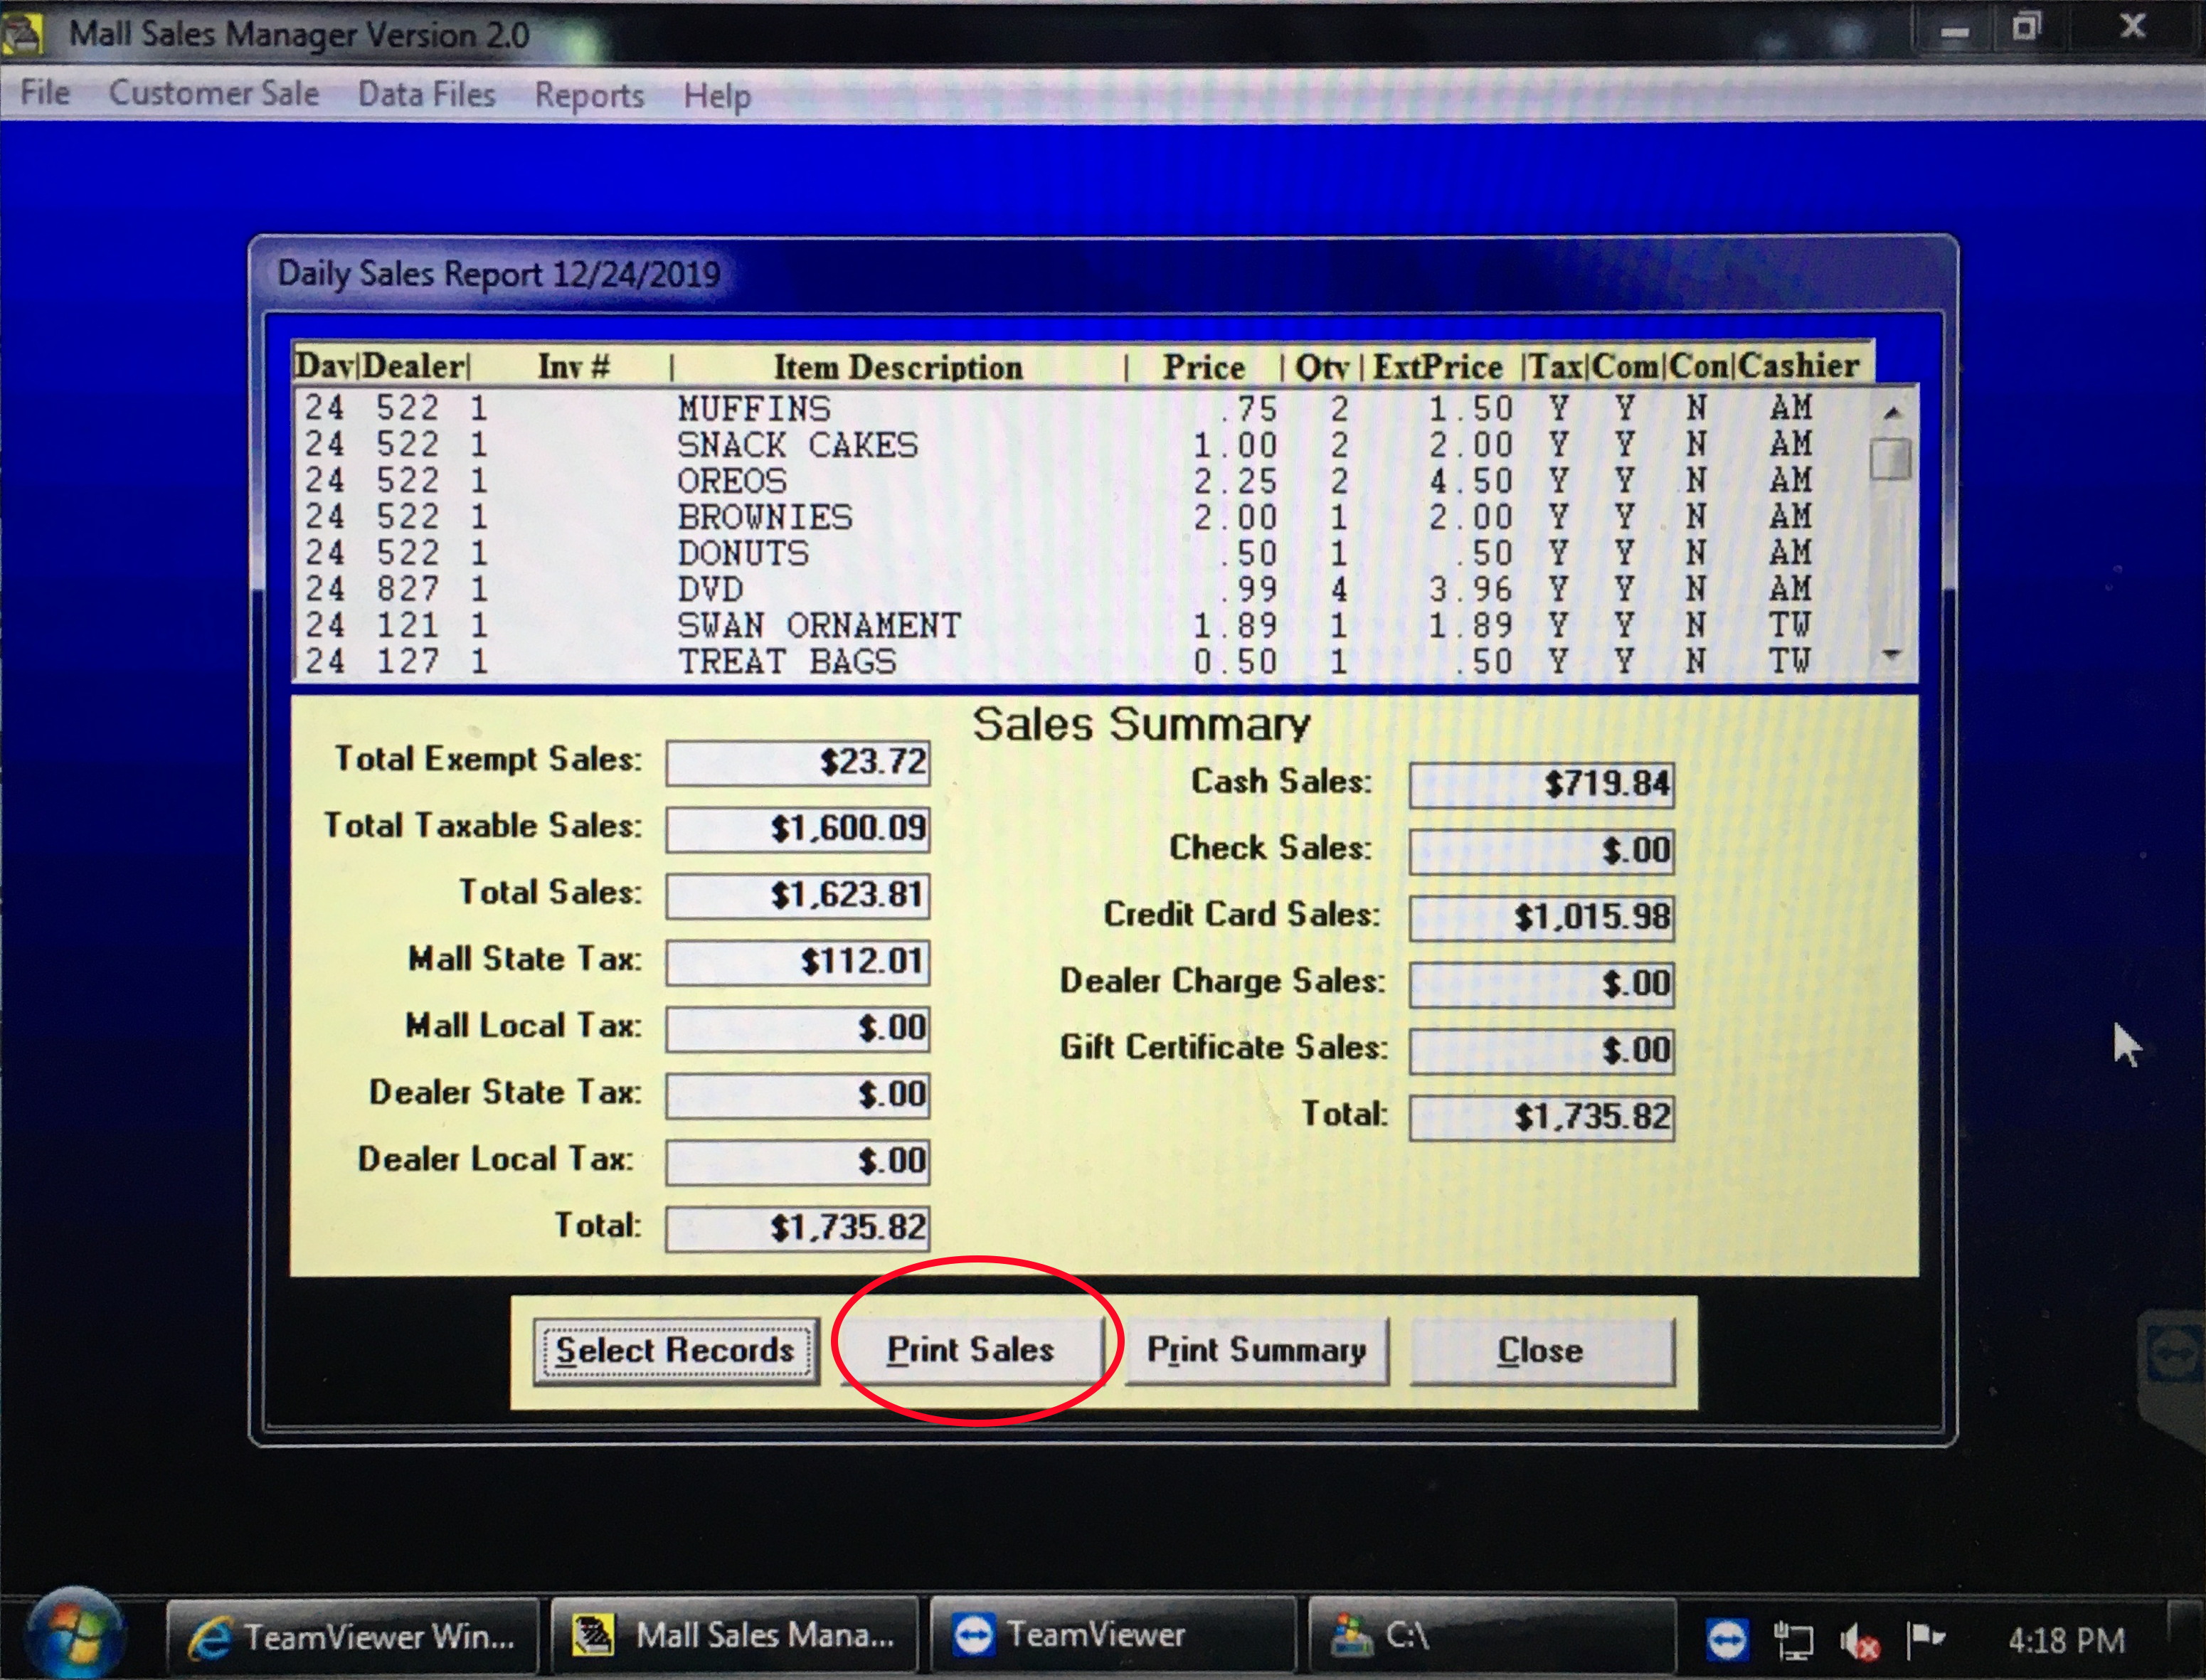
 From the main screen of Mall Sales Manager, select "Reports>Daily Sales Report".
 Select Records for today (or any day).
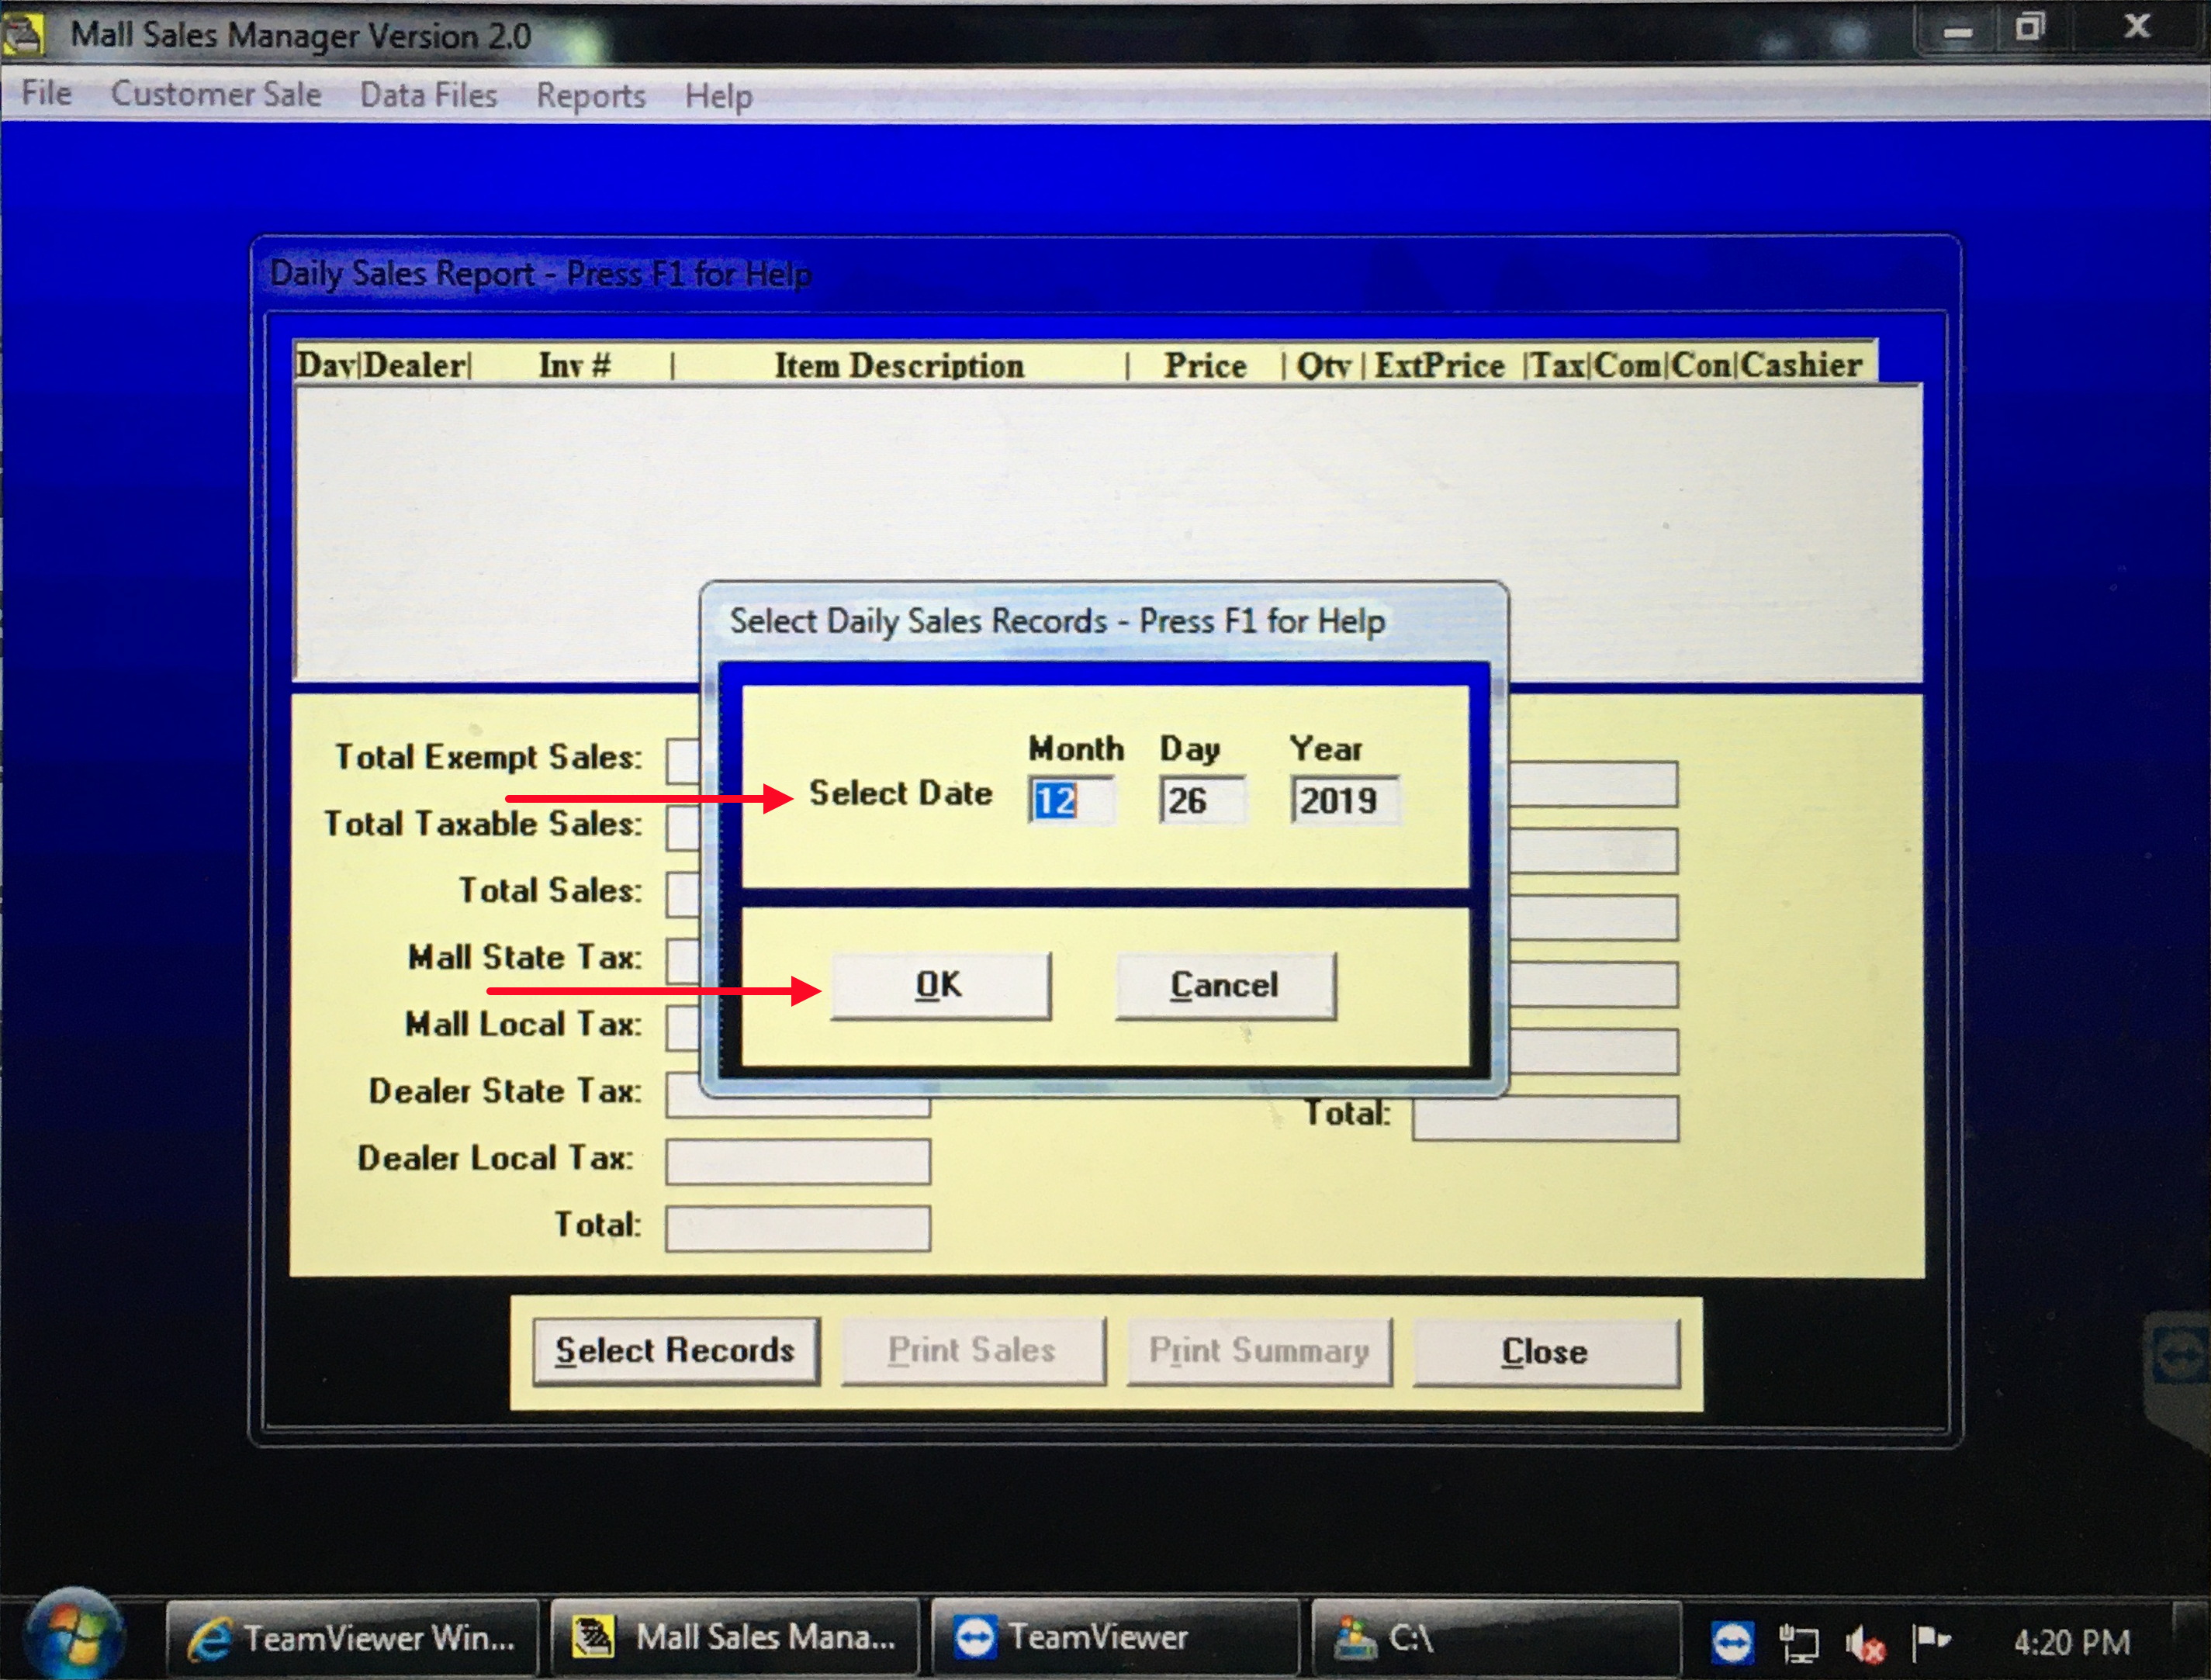 Print Sales.
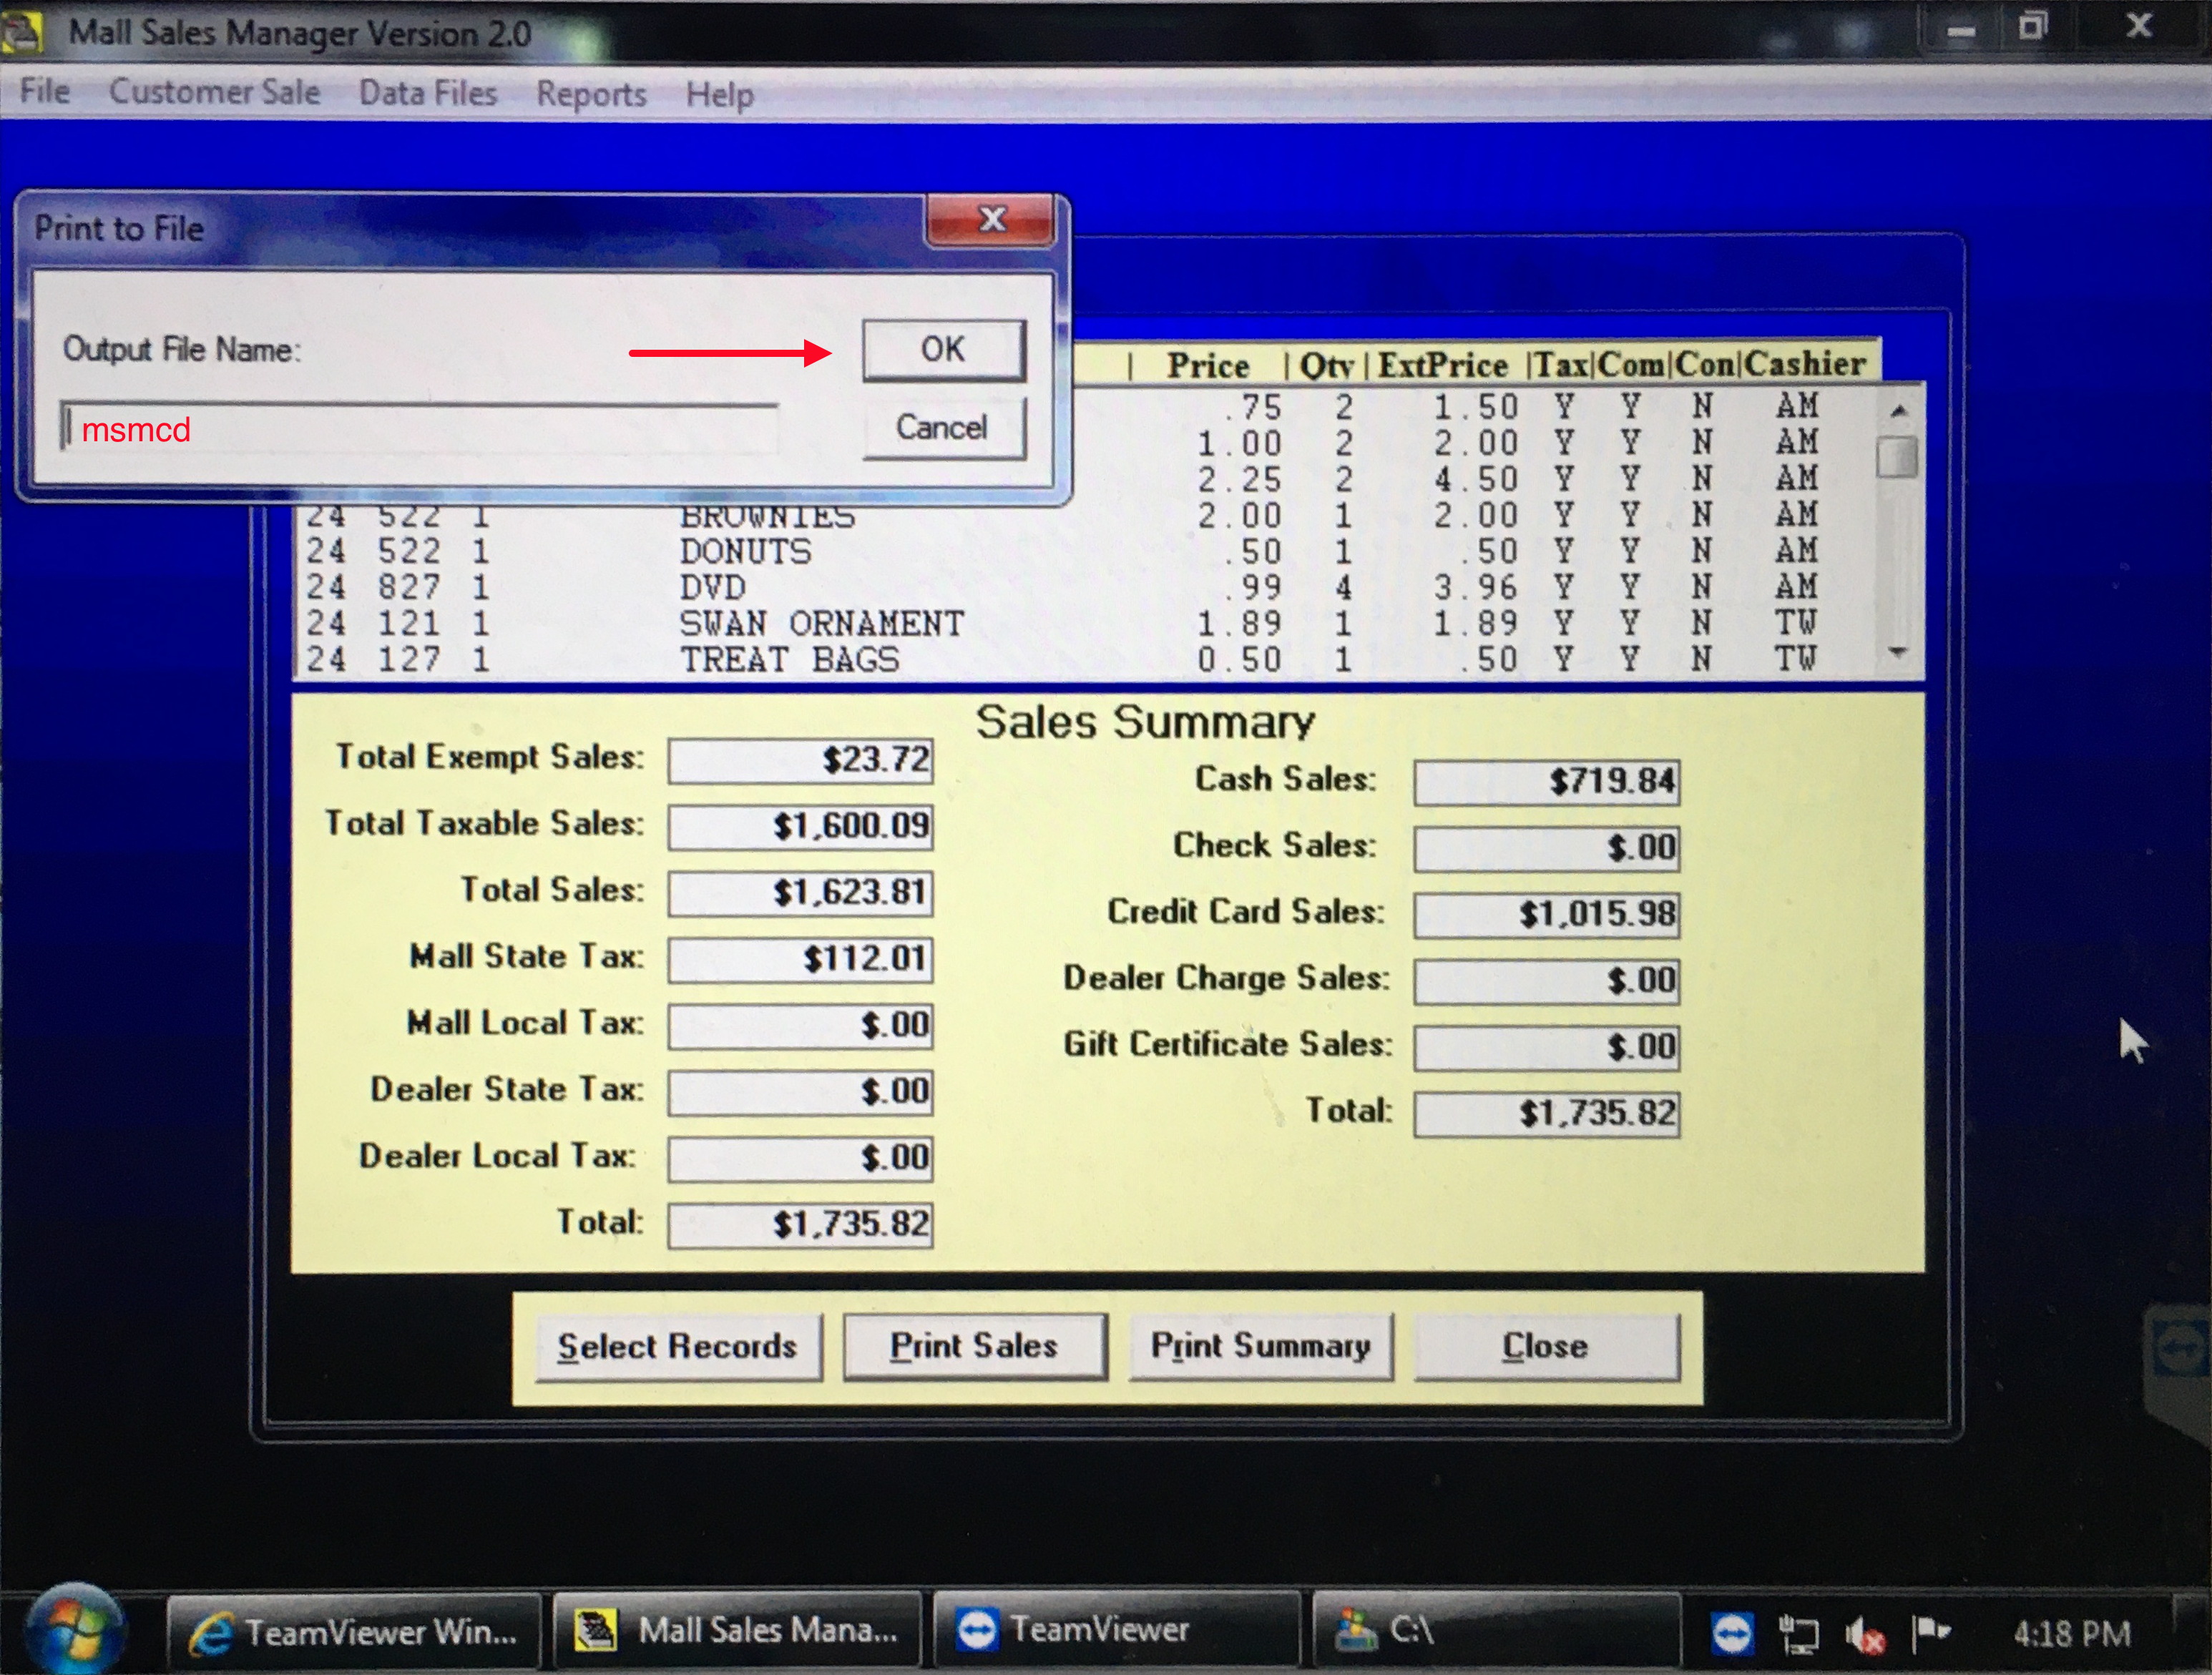
 Specify the Output Filename as msmcd. Click OK. The usual ".txt" will be appended
when viewed in the directory.
Specify the Output Filename as msmcd. Click OK. The usual ".txt" will be appended
when viewed in the directory.
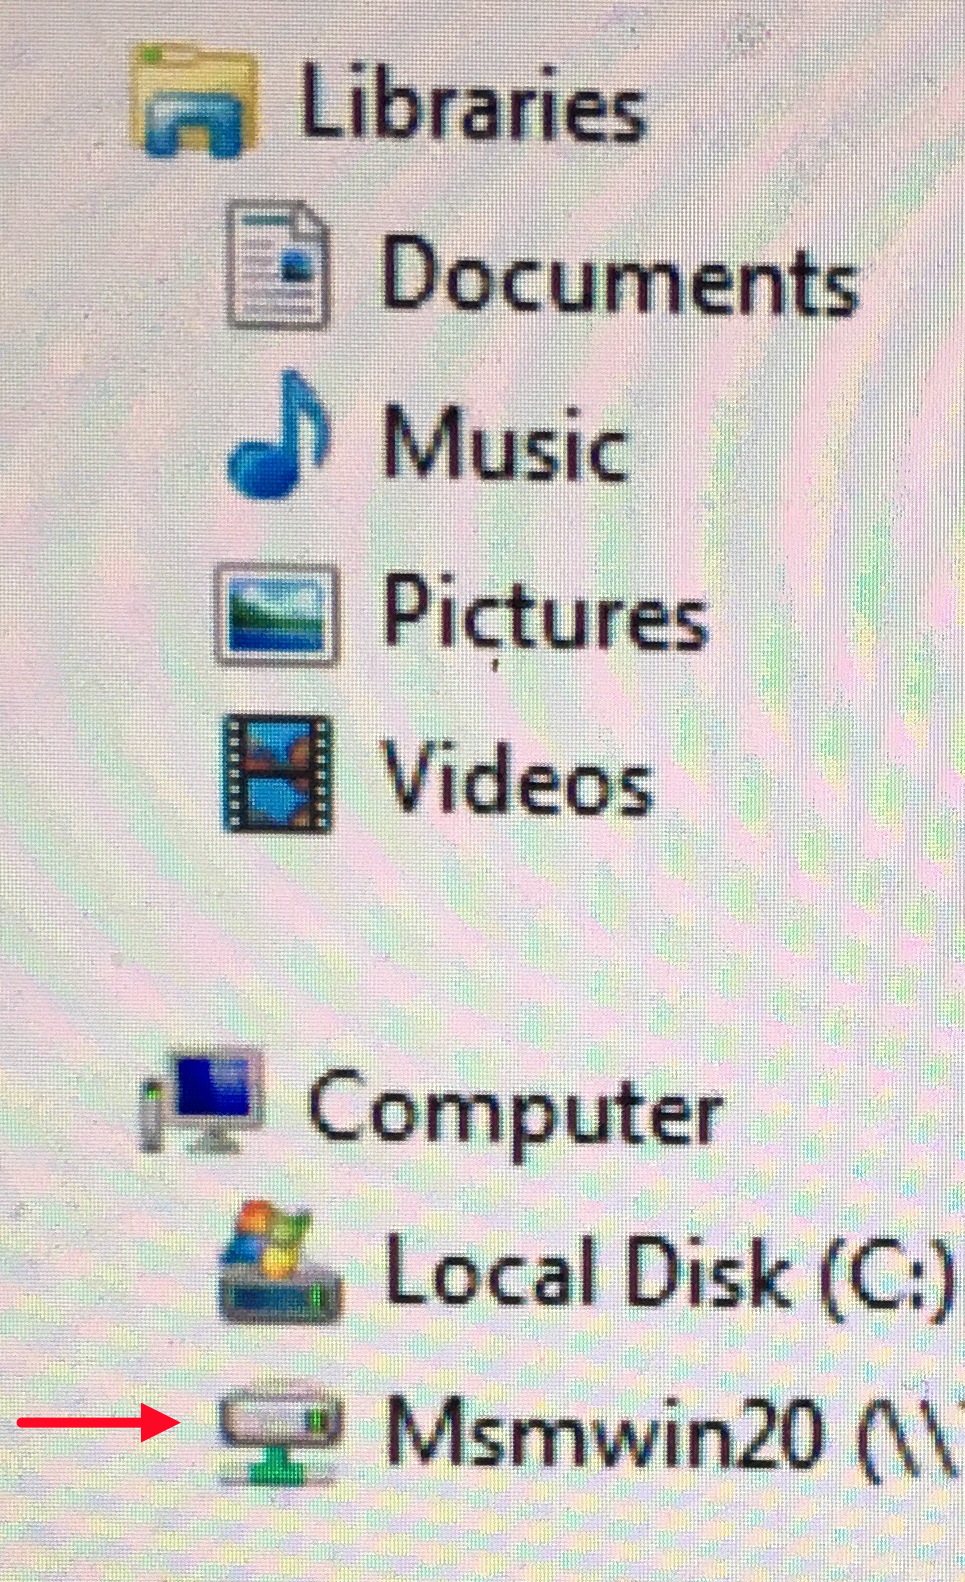
 It is not sure where this file will be saved (maybe C:\users\public\msmwin20\). Once you
find out where it was saved (use START>Search) you will want to move the helper files
(ie SALES_UPLOAD.BAT and MALLUPLD.EXE) to the same folder and create a shortcut for
SALES_UPLOAD.BAT and place it on the desktop for your convenience.
Here is a screenshot from a user's computer screen. Looks like they are using a network
and this location is mapped to drive T: (you cannot see this in the screenshot but does
explain the icon). This location contains hundreds of files and adding our helper files
does no harm - it just makes it difficult to find the files to confirm they are there:
It is not sure where this file will be saved (maybe C:\users\public\msmwin20\). Once you
find out where it was saved (use START>Search) you will want to move the helper files
(ie SALES_UPLOAD.BAT and MALLUPLD.EXE) to the same folder and create a shortcut for
SALES_UPLOAD.BAT and place it on the desktop for your convenience.
Here is a screenshot from a user's computer screen. Looks like they are using a network
and this location is mapped to drive T: (you cannot see this in the screenshot but does
explain the icon). This location contains hundreds of files and adding our helper files
does no harm - it just makes it difficult to find the files to confirm they are there:
 Change the Printer Setup and Quit Mall Sales Manager as appropriate.
We want you to create a report first so we can determine where to put the Mall-Central.com
"helper" files. In this example we need to place them in the Msmwin20 drive. We were able
to determine this because the file msmcd.txt was found there (Beware: not all Windows
machines display the ".txt" extension so you might find msmcd text file).
Log into your Store Page to find the following Helper Files:
MALLUPLD.EXE
SALES_UPLOAD.BAT
MCTEST.BAT
There is a link on your Store Page with instructions on how to download and install these
files.
You will want to create a shortcut on your desktop by right mouse click SALES_UPLOAD.BAT
on your computer and SEND TO Desktop.
Double-click on the SALES_UPLOAD shortcut on the desktop to do the actual upload.
NOTE: Always be sure that the Upload Filename matches the saved file (msm or msmcd) and
that MSM is selected as the Upload Filetype on your Store Page.
Everyday you will need to do the following:
- From Mall Sales Manager change the printer setup to Generic
- Create a Daily Sales Report
- Restore the Printer Setup
- Quit Mall Sales Manager as needed
- Launch the shortcut
That's it!
Hints:
- You need to upload each day separately.
- When you print a new day from MSM you need to get an "overwrite" message.
If you dont you are doing something wrong
- After uploading each day you need to check your sales on the Report Page
before doing another day, otherwise, the next day may not upload.
Your account needs to be set up for msmcd.txt for filename and MSM for filetype and
file needs to be deleted after upload option needs to be checked.
dtd: 12/27/2019
Change the Printer Setup and Quit Mall Sales Manager as appropriate.
We want you to create a report first so we can determine where to put the Mall-Central.com
"helper" files. In this example we need to place them in the Msmwin20 drive. We were able
to determine this because the file msmcd.txt was found there (Beware: not all Windows
machines display the ".txt" extension so you might find msmcd text file).
Log into your Store Page to find the following Helper Files:
MALLUPLD.EXE
SALES_UPLOAD.BAT
MCTEST.BAT
There is a link on your Store Page with instructions on how to download and install these
files.
You will want to create a shortcut on your desktop by right mouse click SALES_UPLOAD.BAT
on your computer and SEND TO Desktop.
Double-click on the SALES_UPLOAD shortcut on the desktop to do the actual upload.
NOTE: Always be sure that the Upload Filename matches the saved file (msm or msmcd) and
that MSM is selected as the Upload Filetype on your Store Page.
Everyday you will need to do the following:
- From Mall Sales Manager change the printer setup to Generic
- Create a Daily Sales Report
- Restore the Printer Setup
- Quit Mall Sales Manager as needed
- Launch the shortcut
That's it!
Hints:
- You need to upload each day separately.
- When you print a new day from MSM you need to get an "overwrite" message.
If you dont you are doing something wrong
- After uploading each day you need to check your sales on the Report Page
before doing another day, otherwise, the next day may not upload.
Your account needs to be set up for msmcd.txt for filename and MSM for filetype and
file needs to be deleted after upload option needs to be checked.
dtd: 12/27/2019